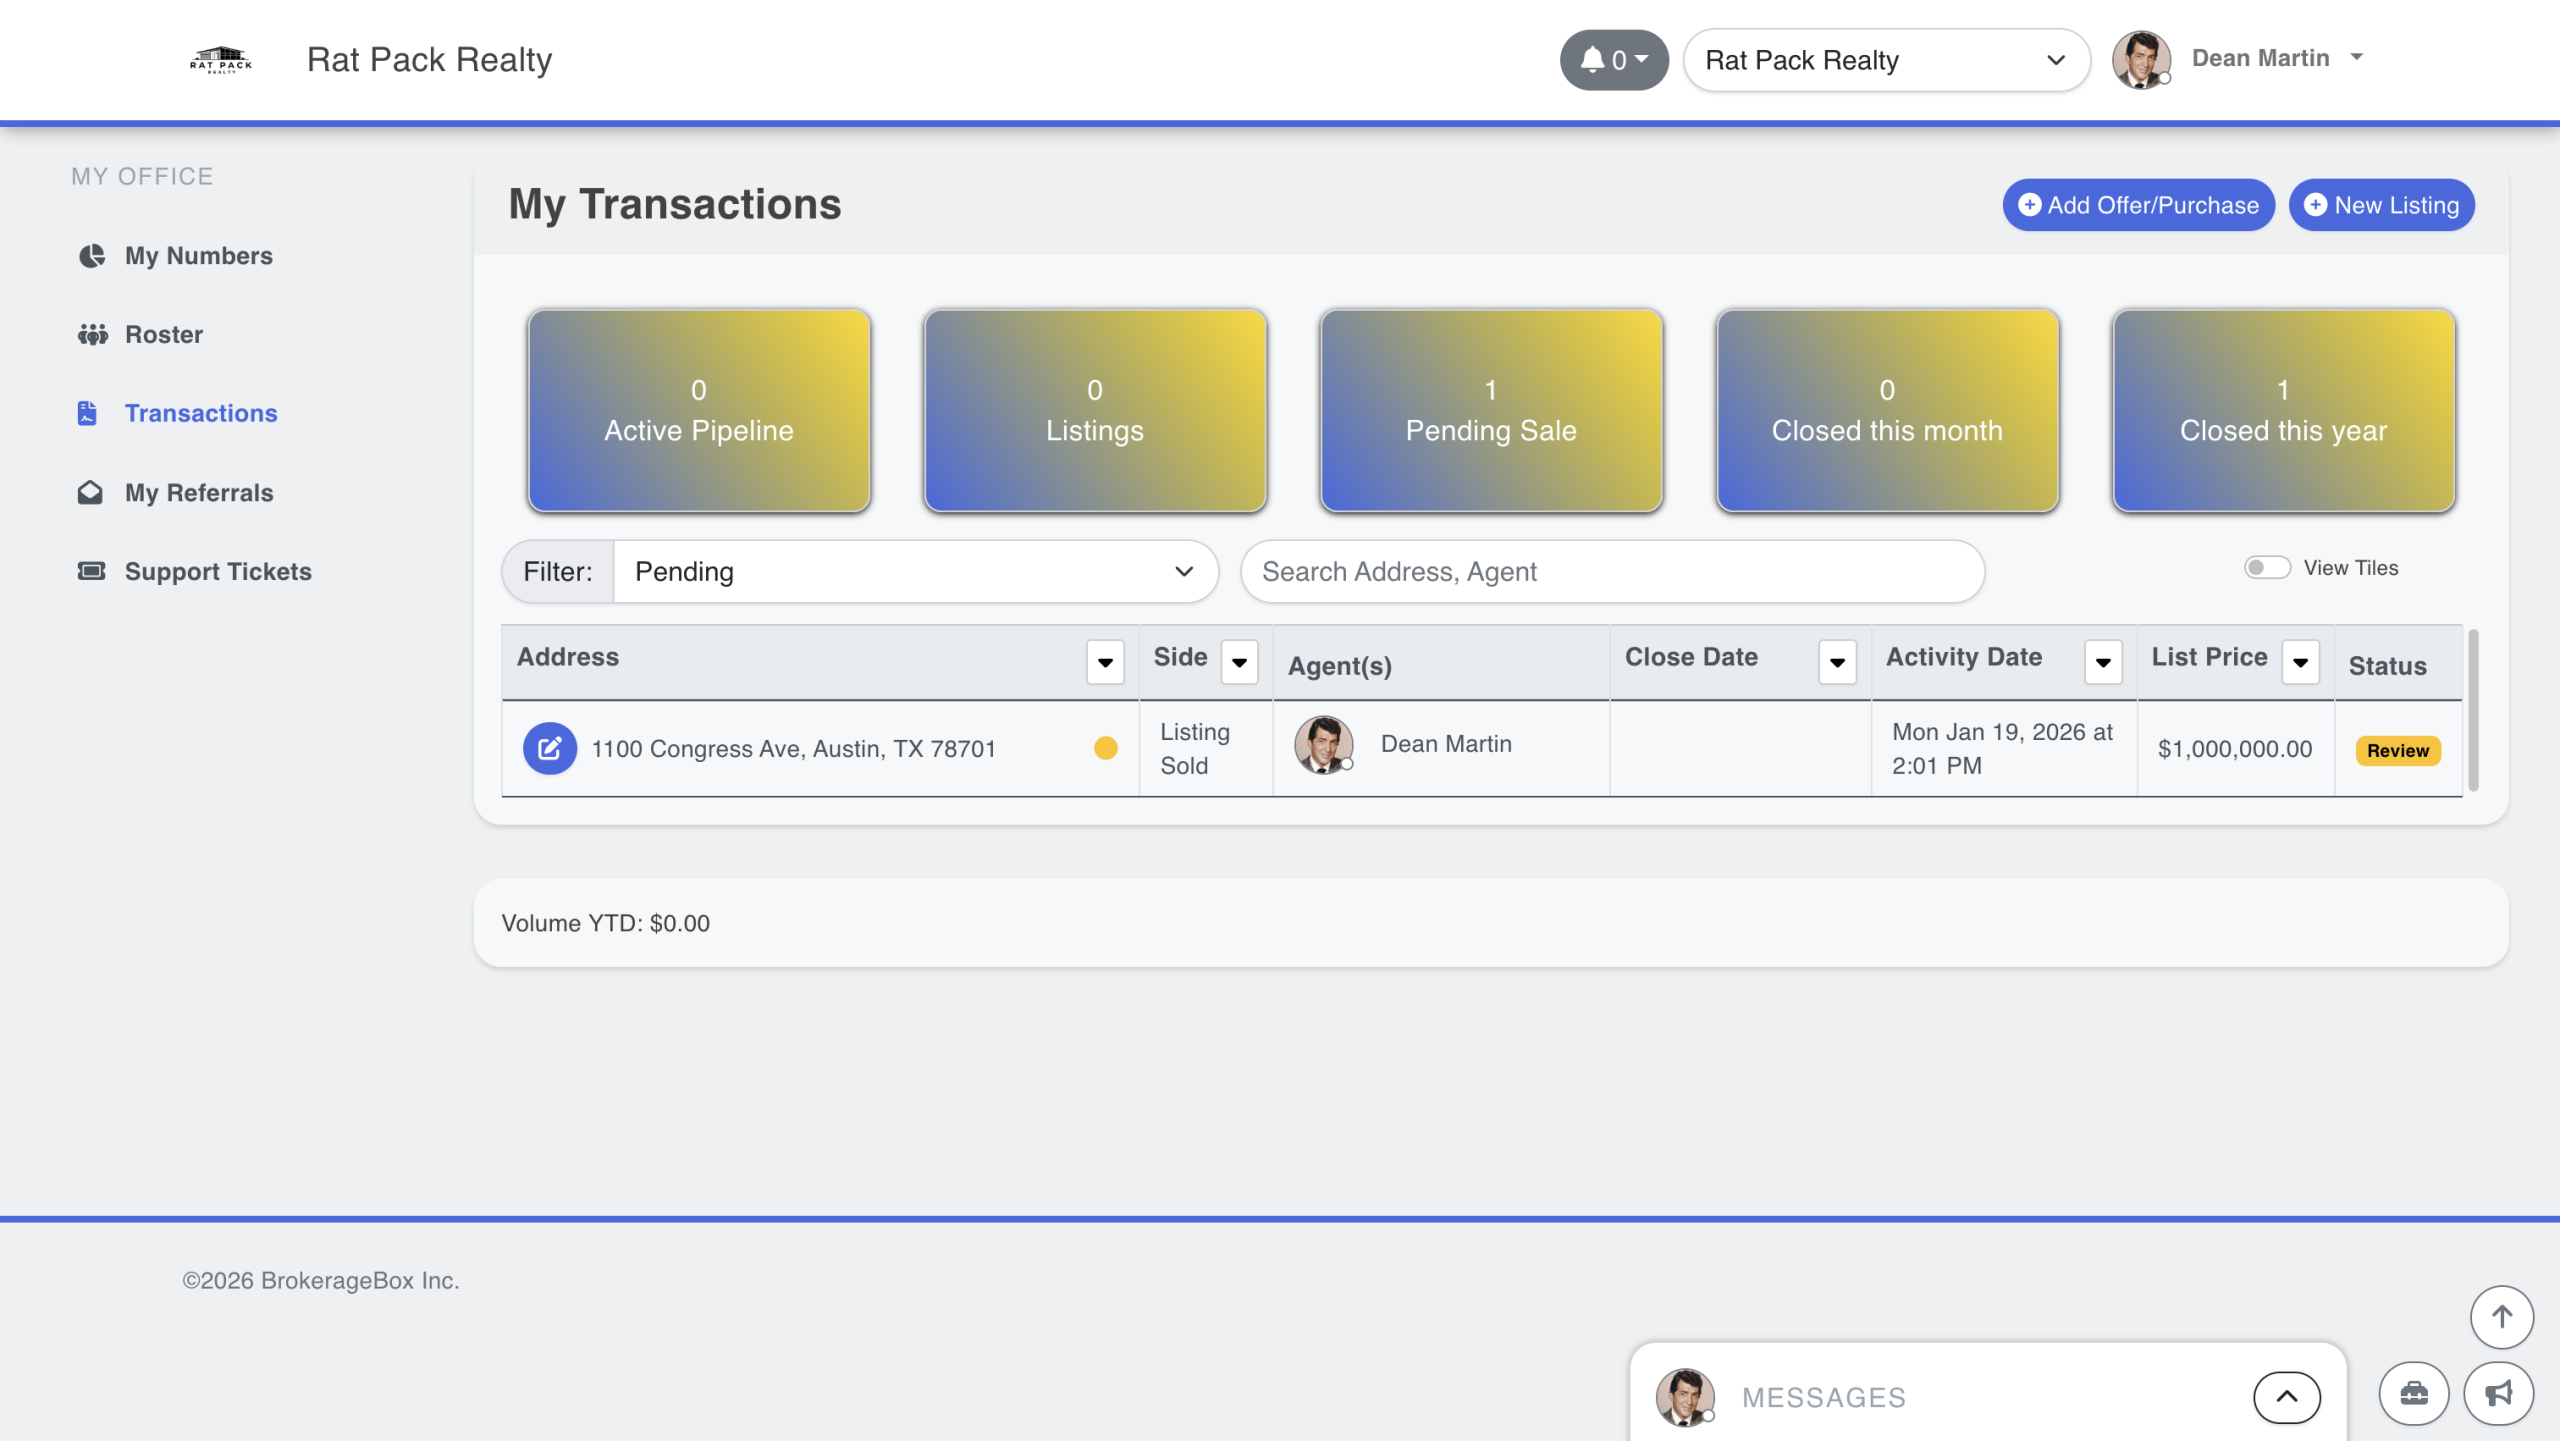
In this support article, we will show you how to create a listing transaction from the seller agent's perspective. We will walk you through creating the listing, entering information relevant to the deal, uploading listing documents, and iteratively updating documentation as prescribed by the transaction coordinator and / or brokerage owner.
A listing transaction refers to the agreement between you and your seller to advertise a listing. Once the listing documents have been reviewed, this listing will stay in the listings category within the Transactions module until you have an offer from a buyer. At this point, you will then upgrade the "listing" to "listing sold", and follow the steps outlined in our support article How to Create a Sale Transaction in BrokerageBox.
Go to Transactions Module
The transactions module is where all of your transactions will be saved. Transactions are categorized by active pipeline (prospective deals), listings, pending sales, closed this month, and closed this year.
To start a listing transaction, click the "Add Active Client / Transaction" button in the top right hand corner of the screen.
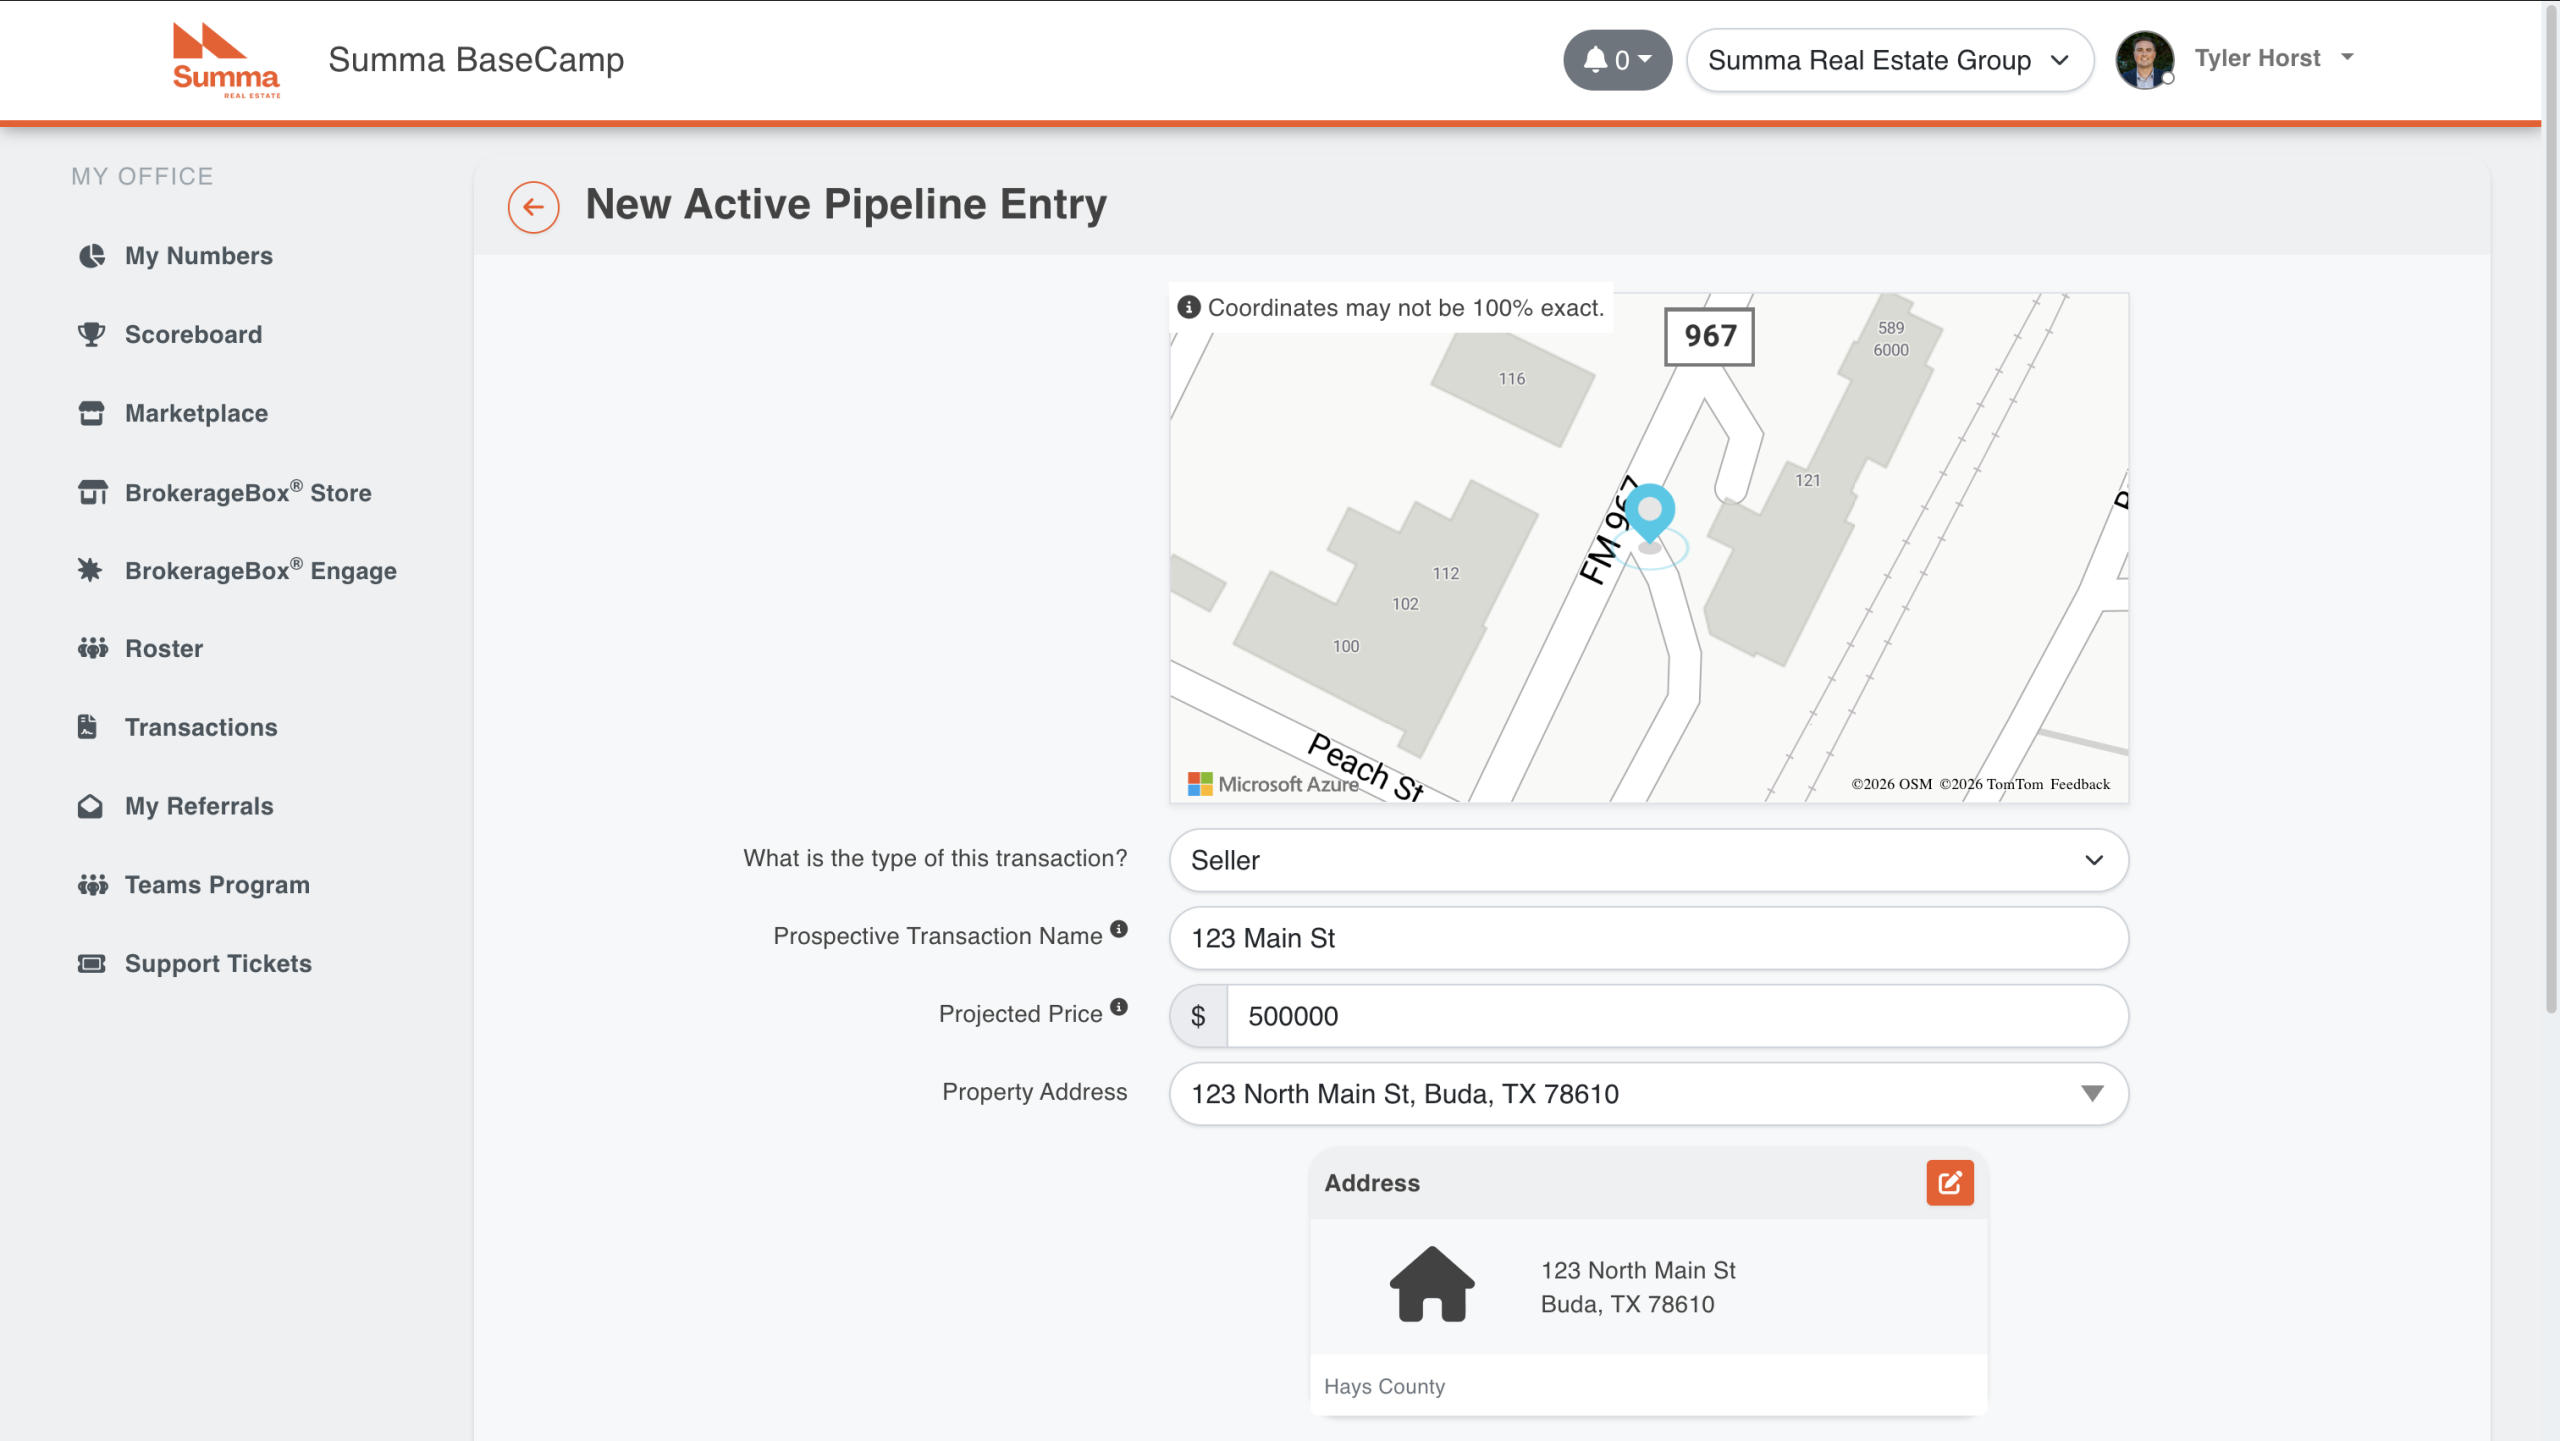
Name Your Transaction
Select "Seller" for transaction type and give it a unique name. Add the projected price, and the property address then scroll down. You must have location services enabled for your browser to type in an address.
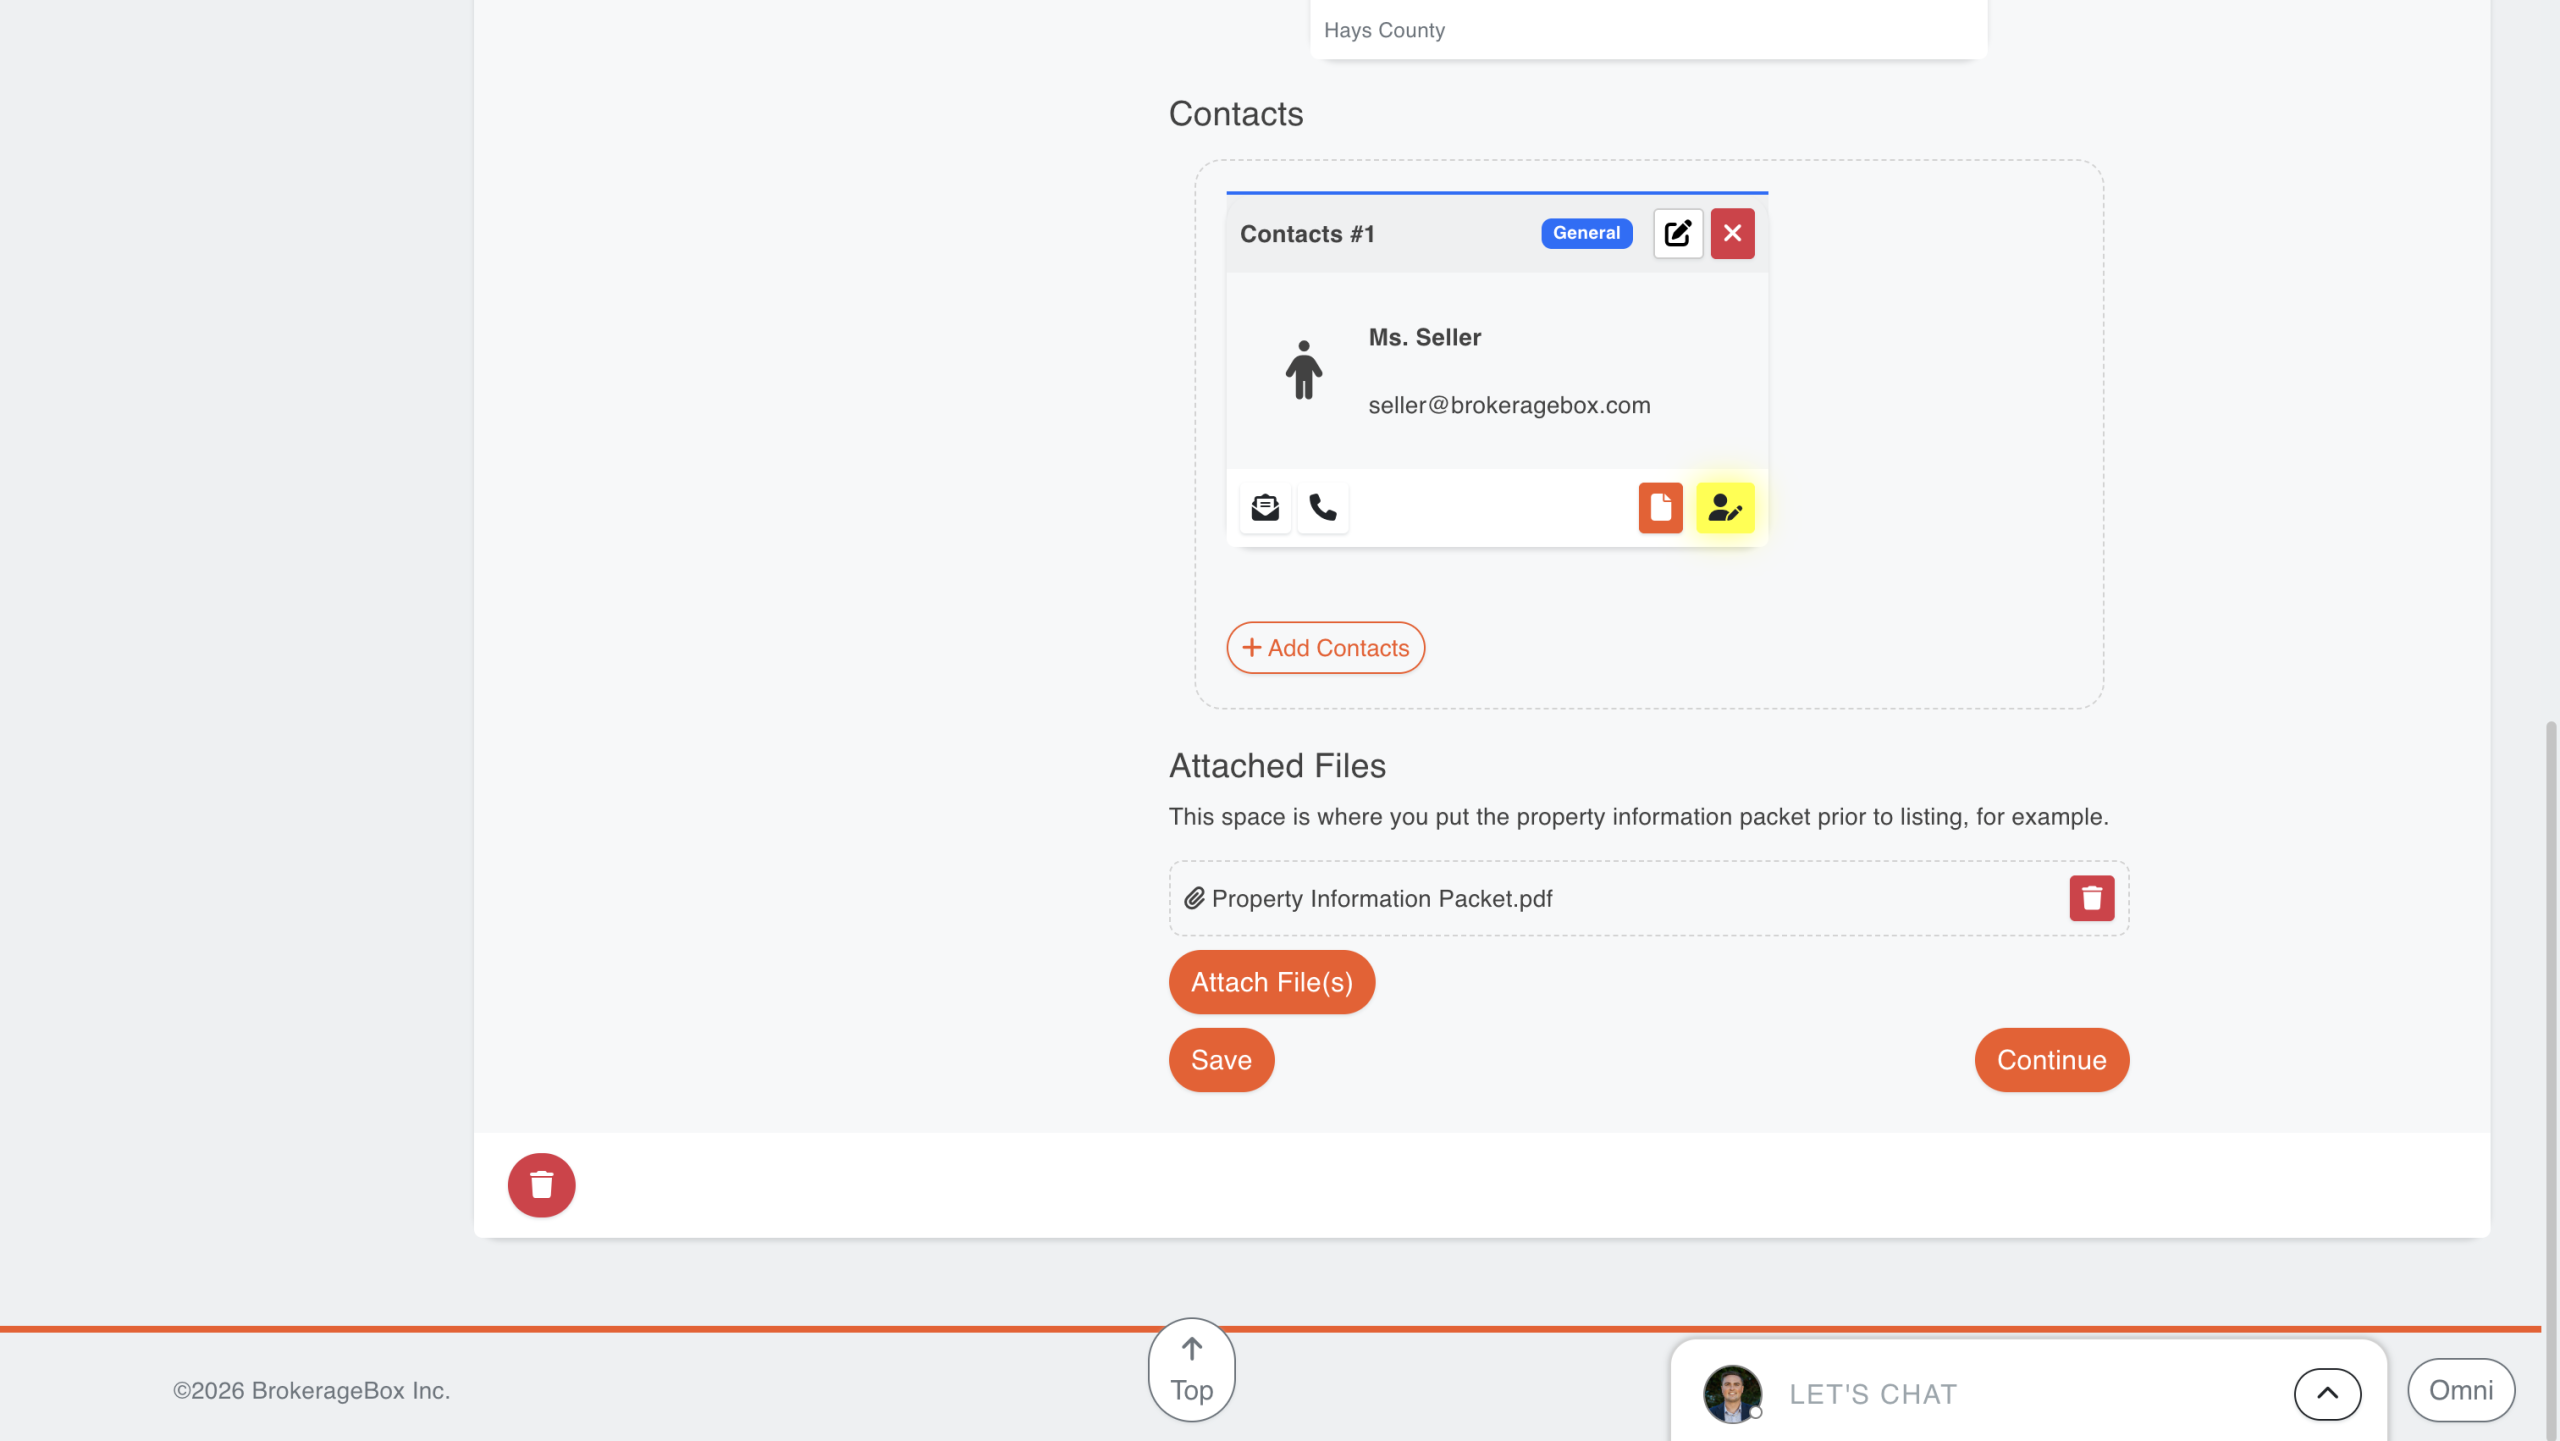
Next, add the seller contact to this transaction. Agents will also have the option to attach any pre-sale documents, such as a property information packet at this time. Click the Save button to store the transaction in your active pipeline.
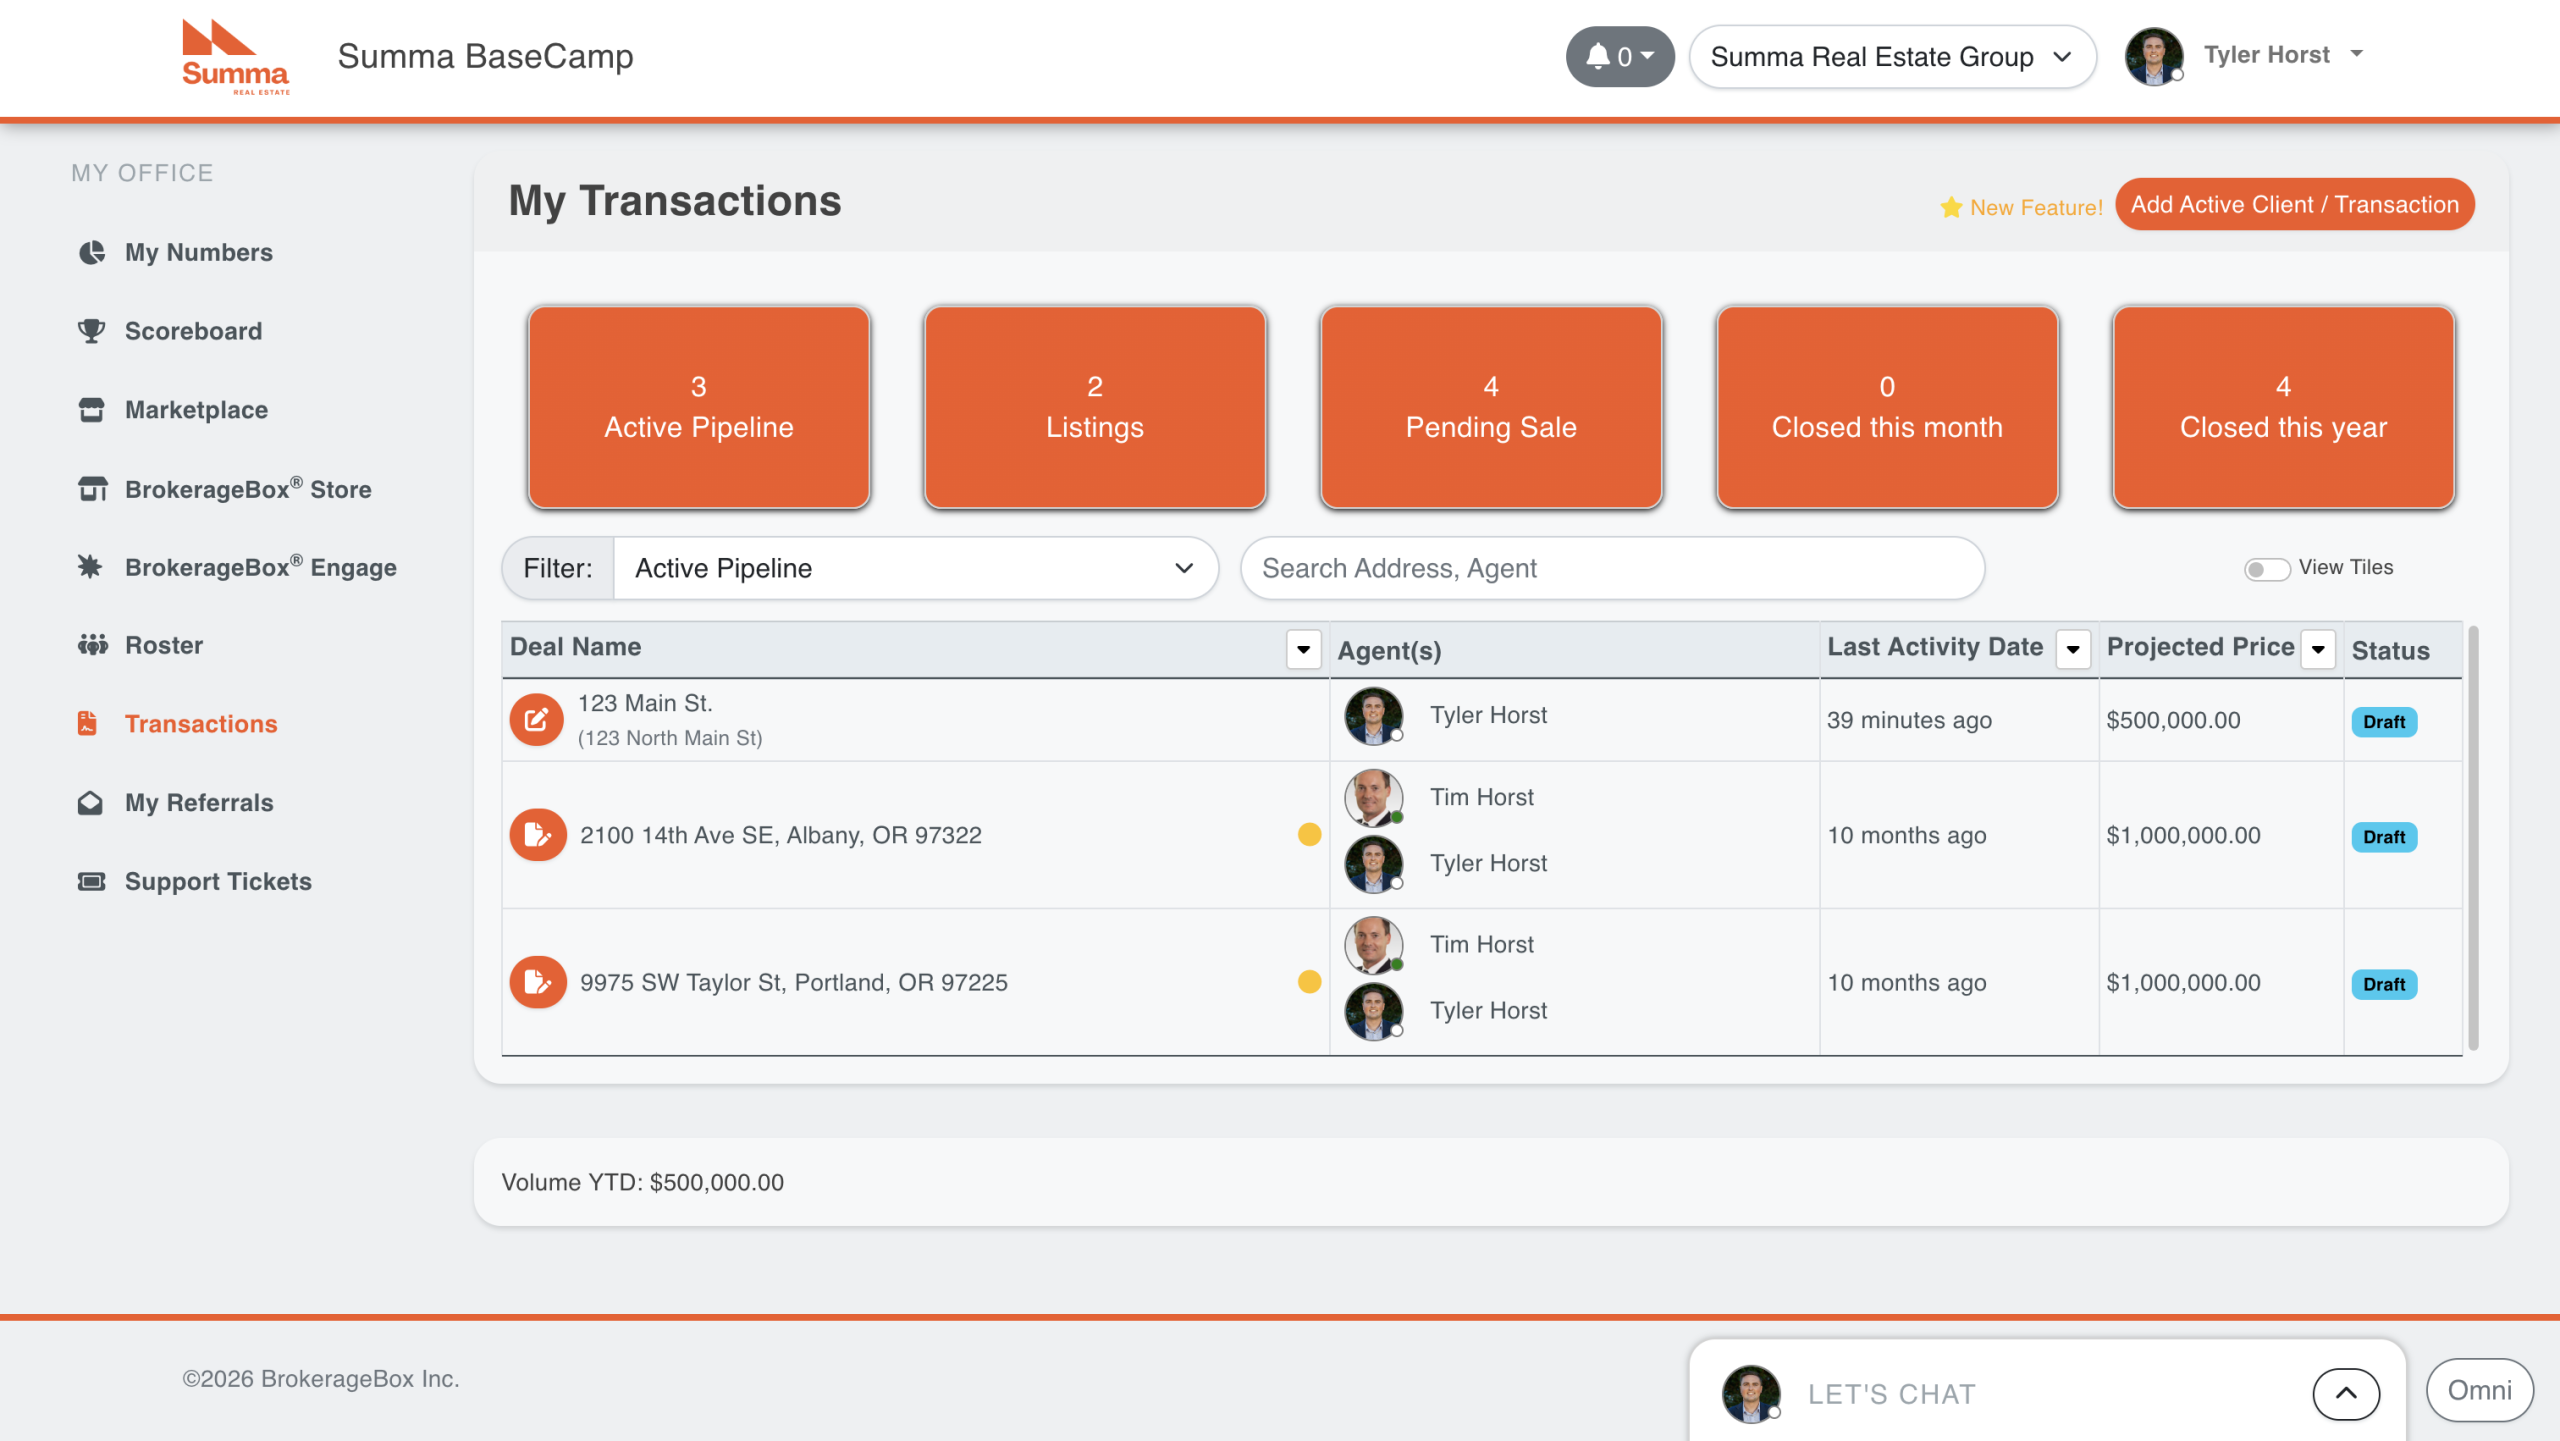
Transaction is in Active Pipeline
The listing transaction will now be stored in the Active Pipeline category until you submit the transaction documents for review. This category is similar to a CRM in that it stores data about potential deals or opportunities. Please note that BrokerageBox does not natively support e-signature or a forms library. Once you have fully-signed listing documents, then you will proceed to the following sections.
Listing transaction will not be shown with any colored dot indicator in the active pipeline category because there are no documents for review. Click the edit button on the left side of the transaction name to open back up the transaction, then click the Continue button.
Enter Listing Information
Enter information relevant to the listing, verify the contacts, then click the Create Listing button.
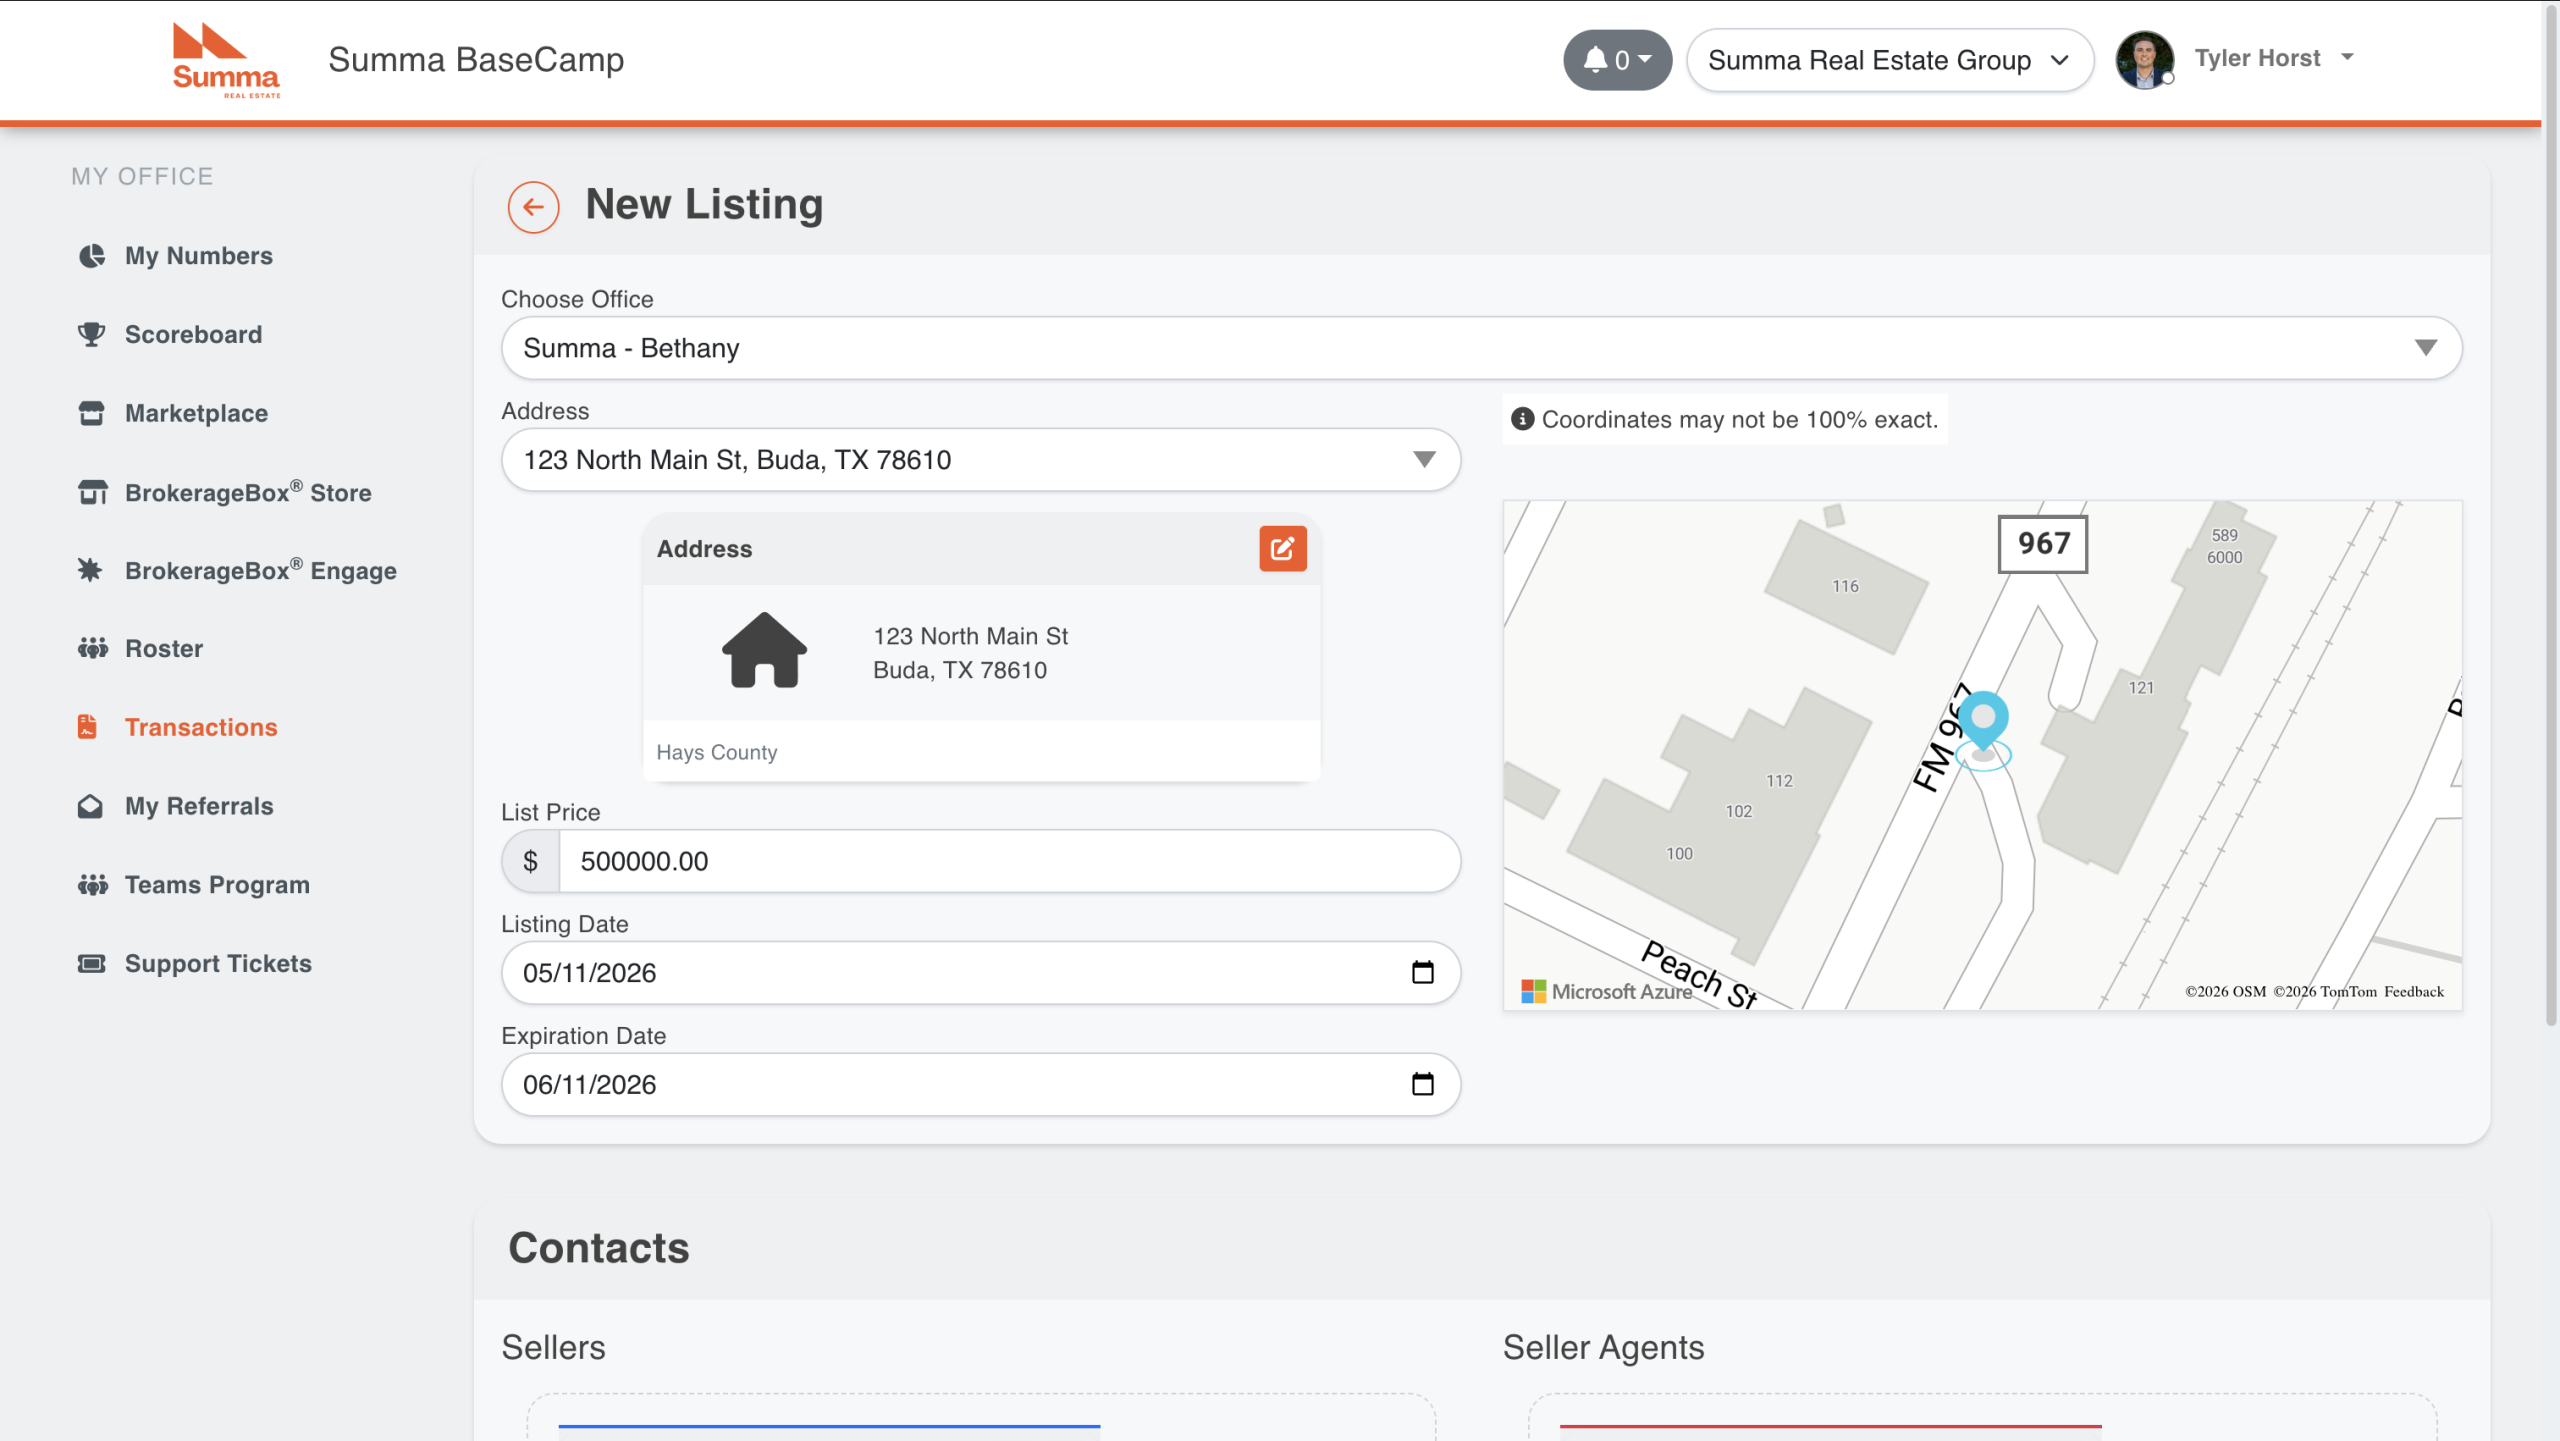
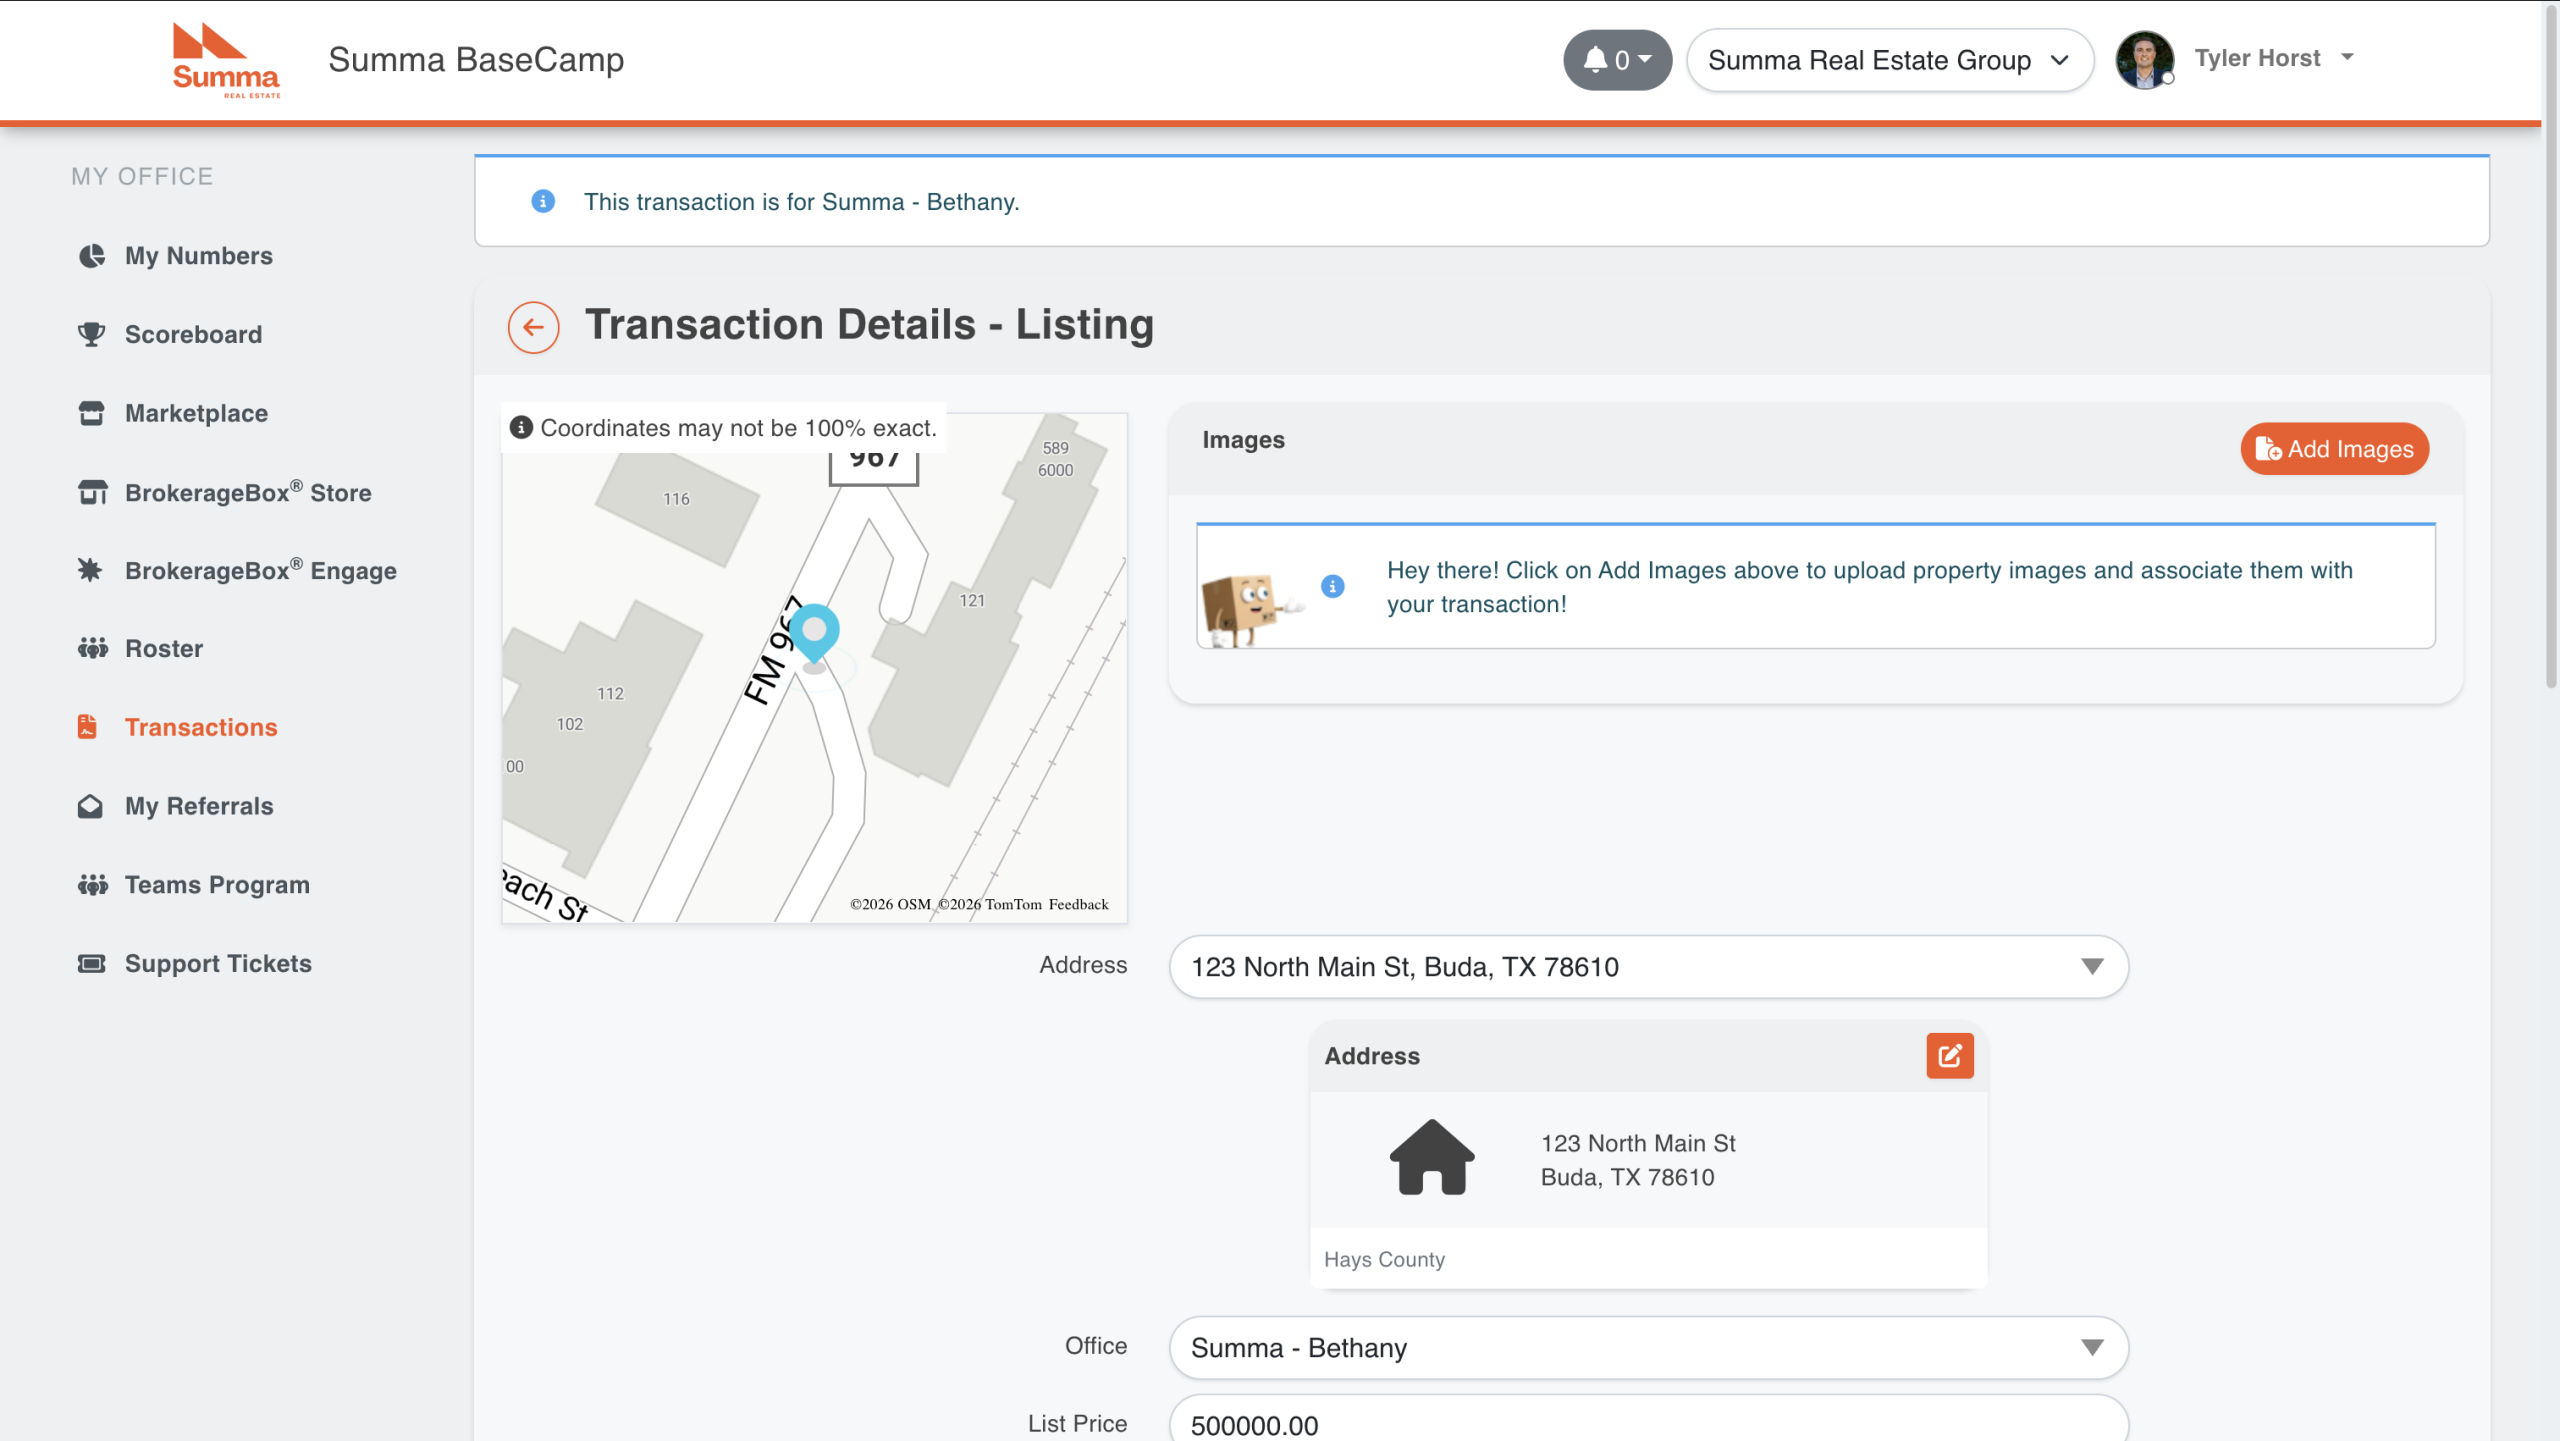
Now, your listing transaction can be found in the Listing category. When you open it back up, you will be presented with a screen where you can more information to your listing transaction. Here, you can add images of the property, and proceed through your listing deal flow.
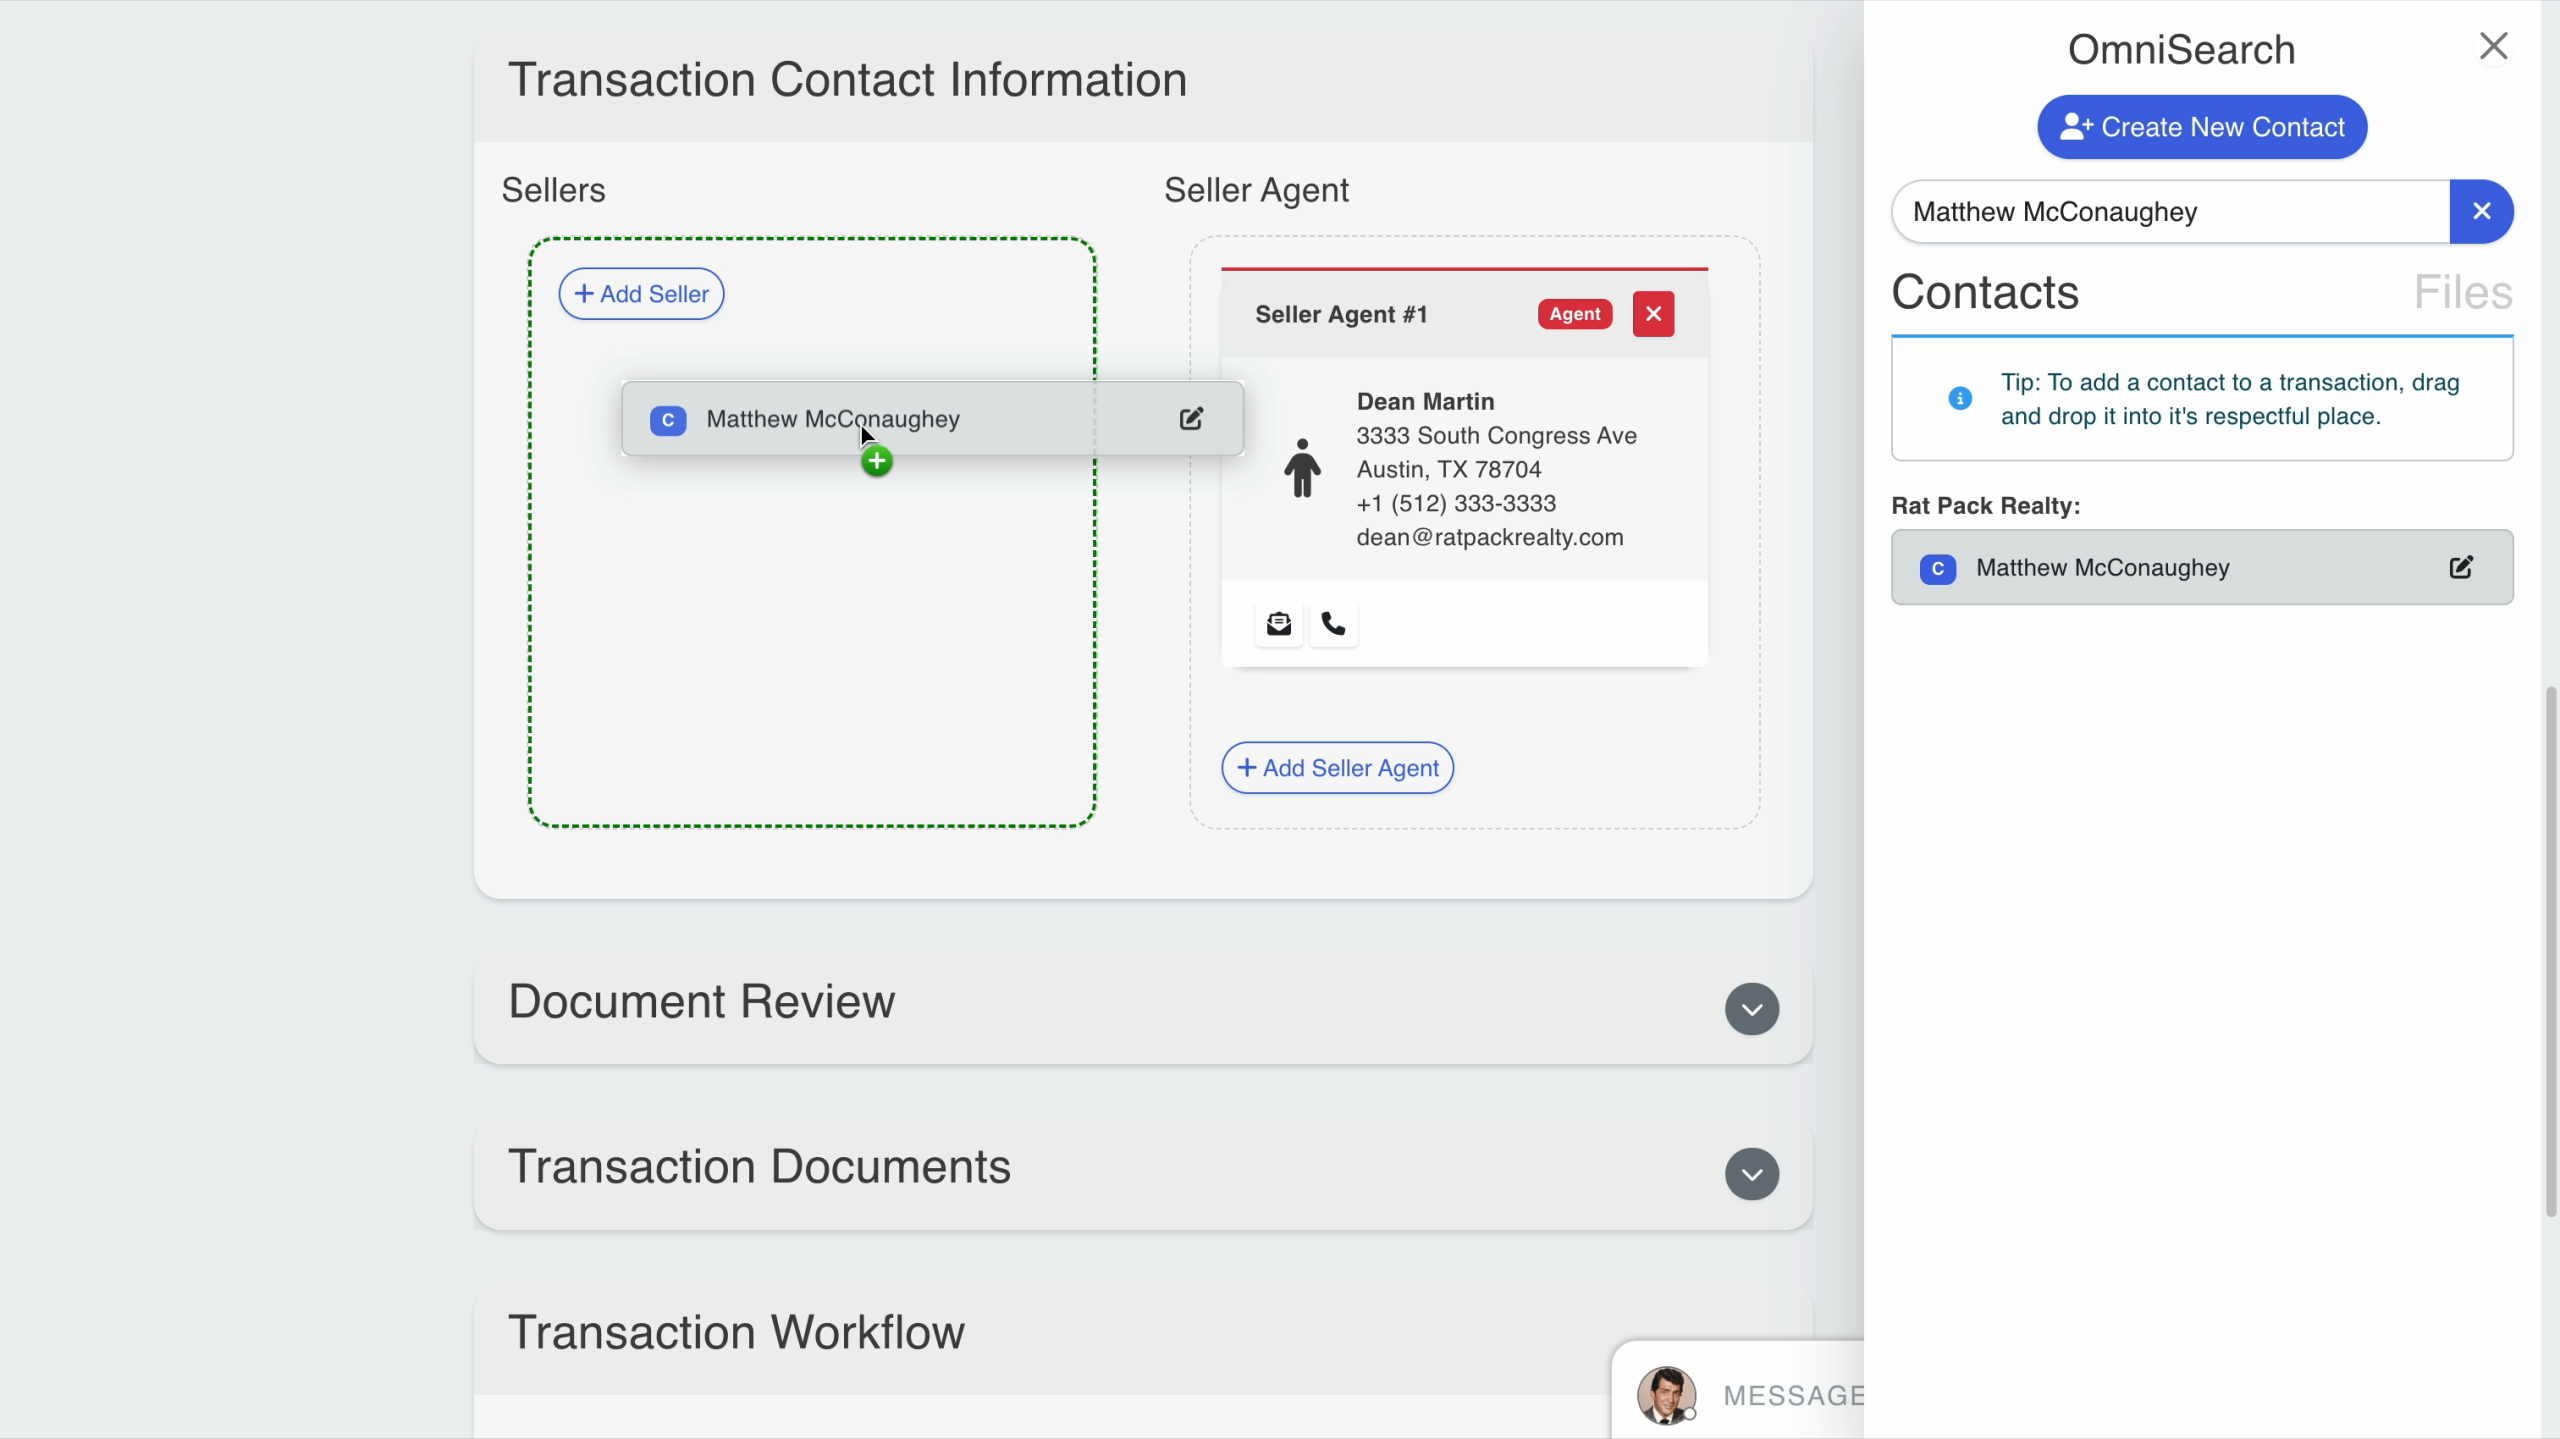
Update Contact Information for Transaction
If you want to update contact information, you can add the relevant contacts to each category by opening the OmniSearch tool found in the bottom right hand corner of the screen. The icon looks like a briefcase. Add contacts by clicking the "Create New Contact" button. These contacts will be automatically saved and are only editable by whoever first created the contact. Drag-and-drop the contacts into each section.
You must enter contact information for each section or else you will not be able to submit the transaction for review.
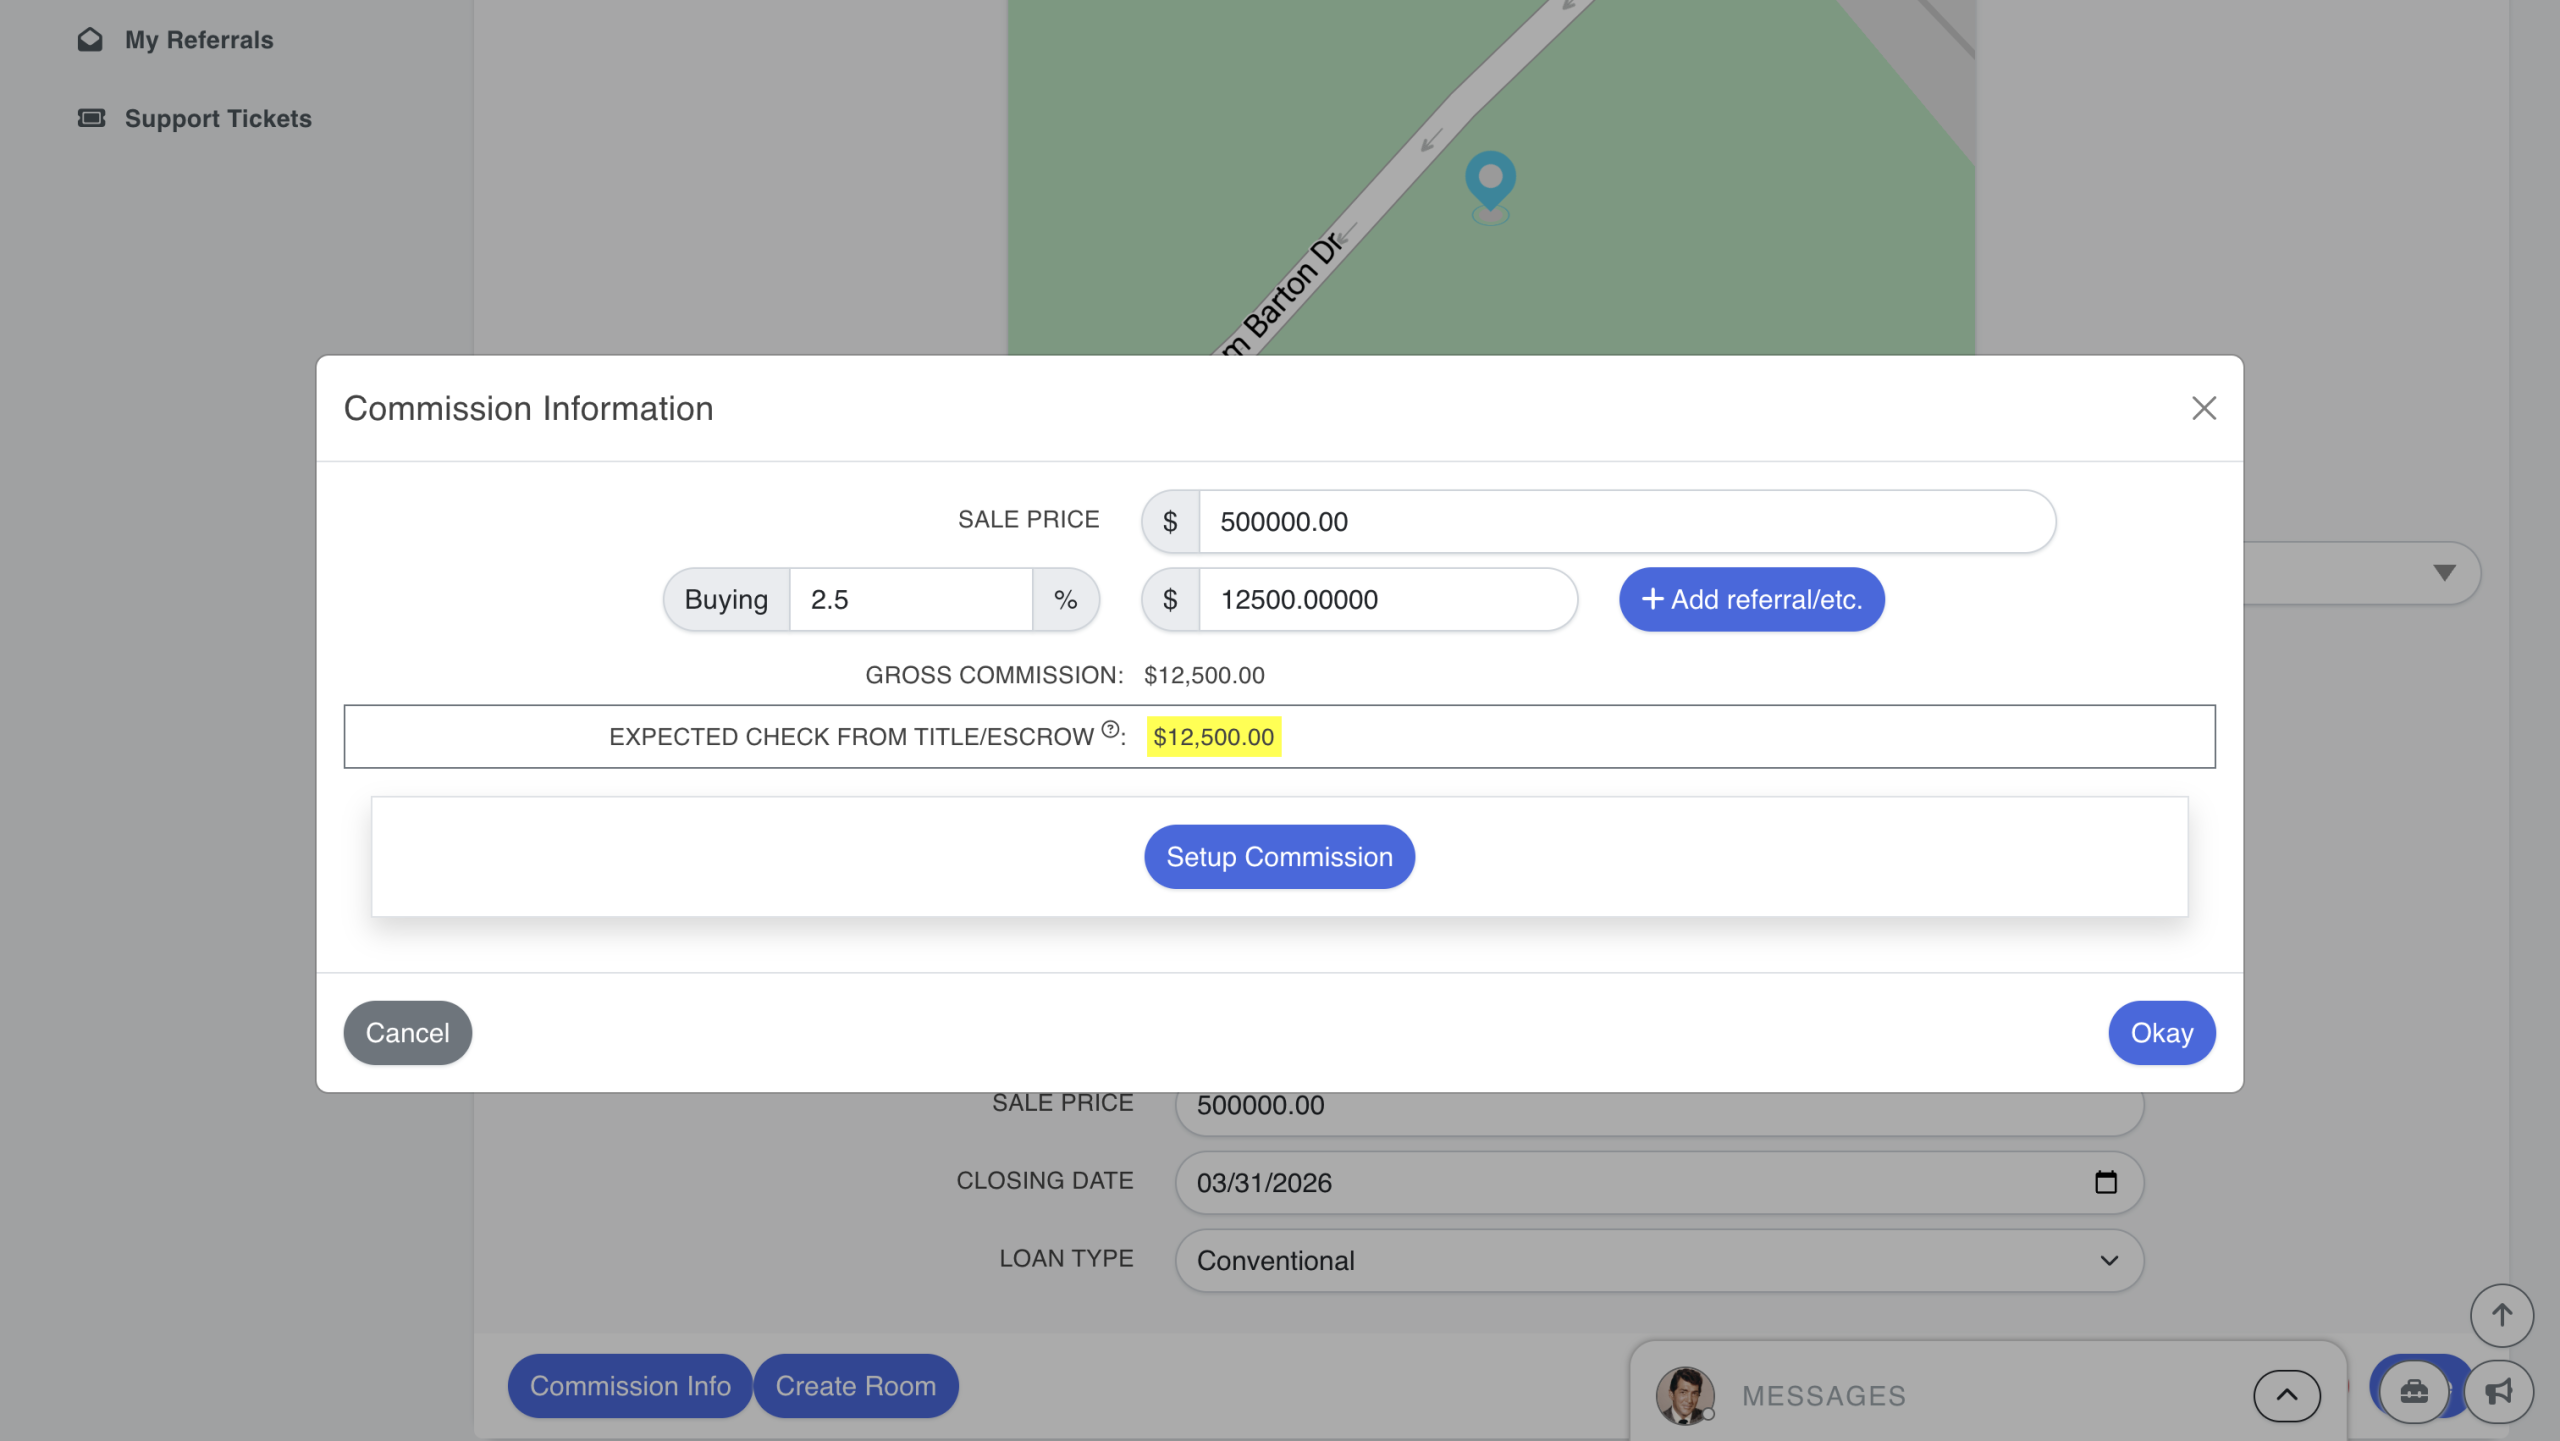
Enter Commission Info
If enabled by the brokerage owner in platform settings, the agent can begin to input their commission info for the sale. However, the "Setup Commission" info button is only available to the brokerage owner.
Upload Fully Signed Listing Documents
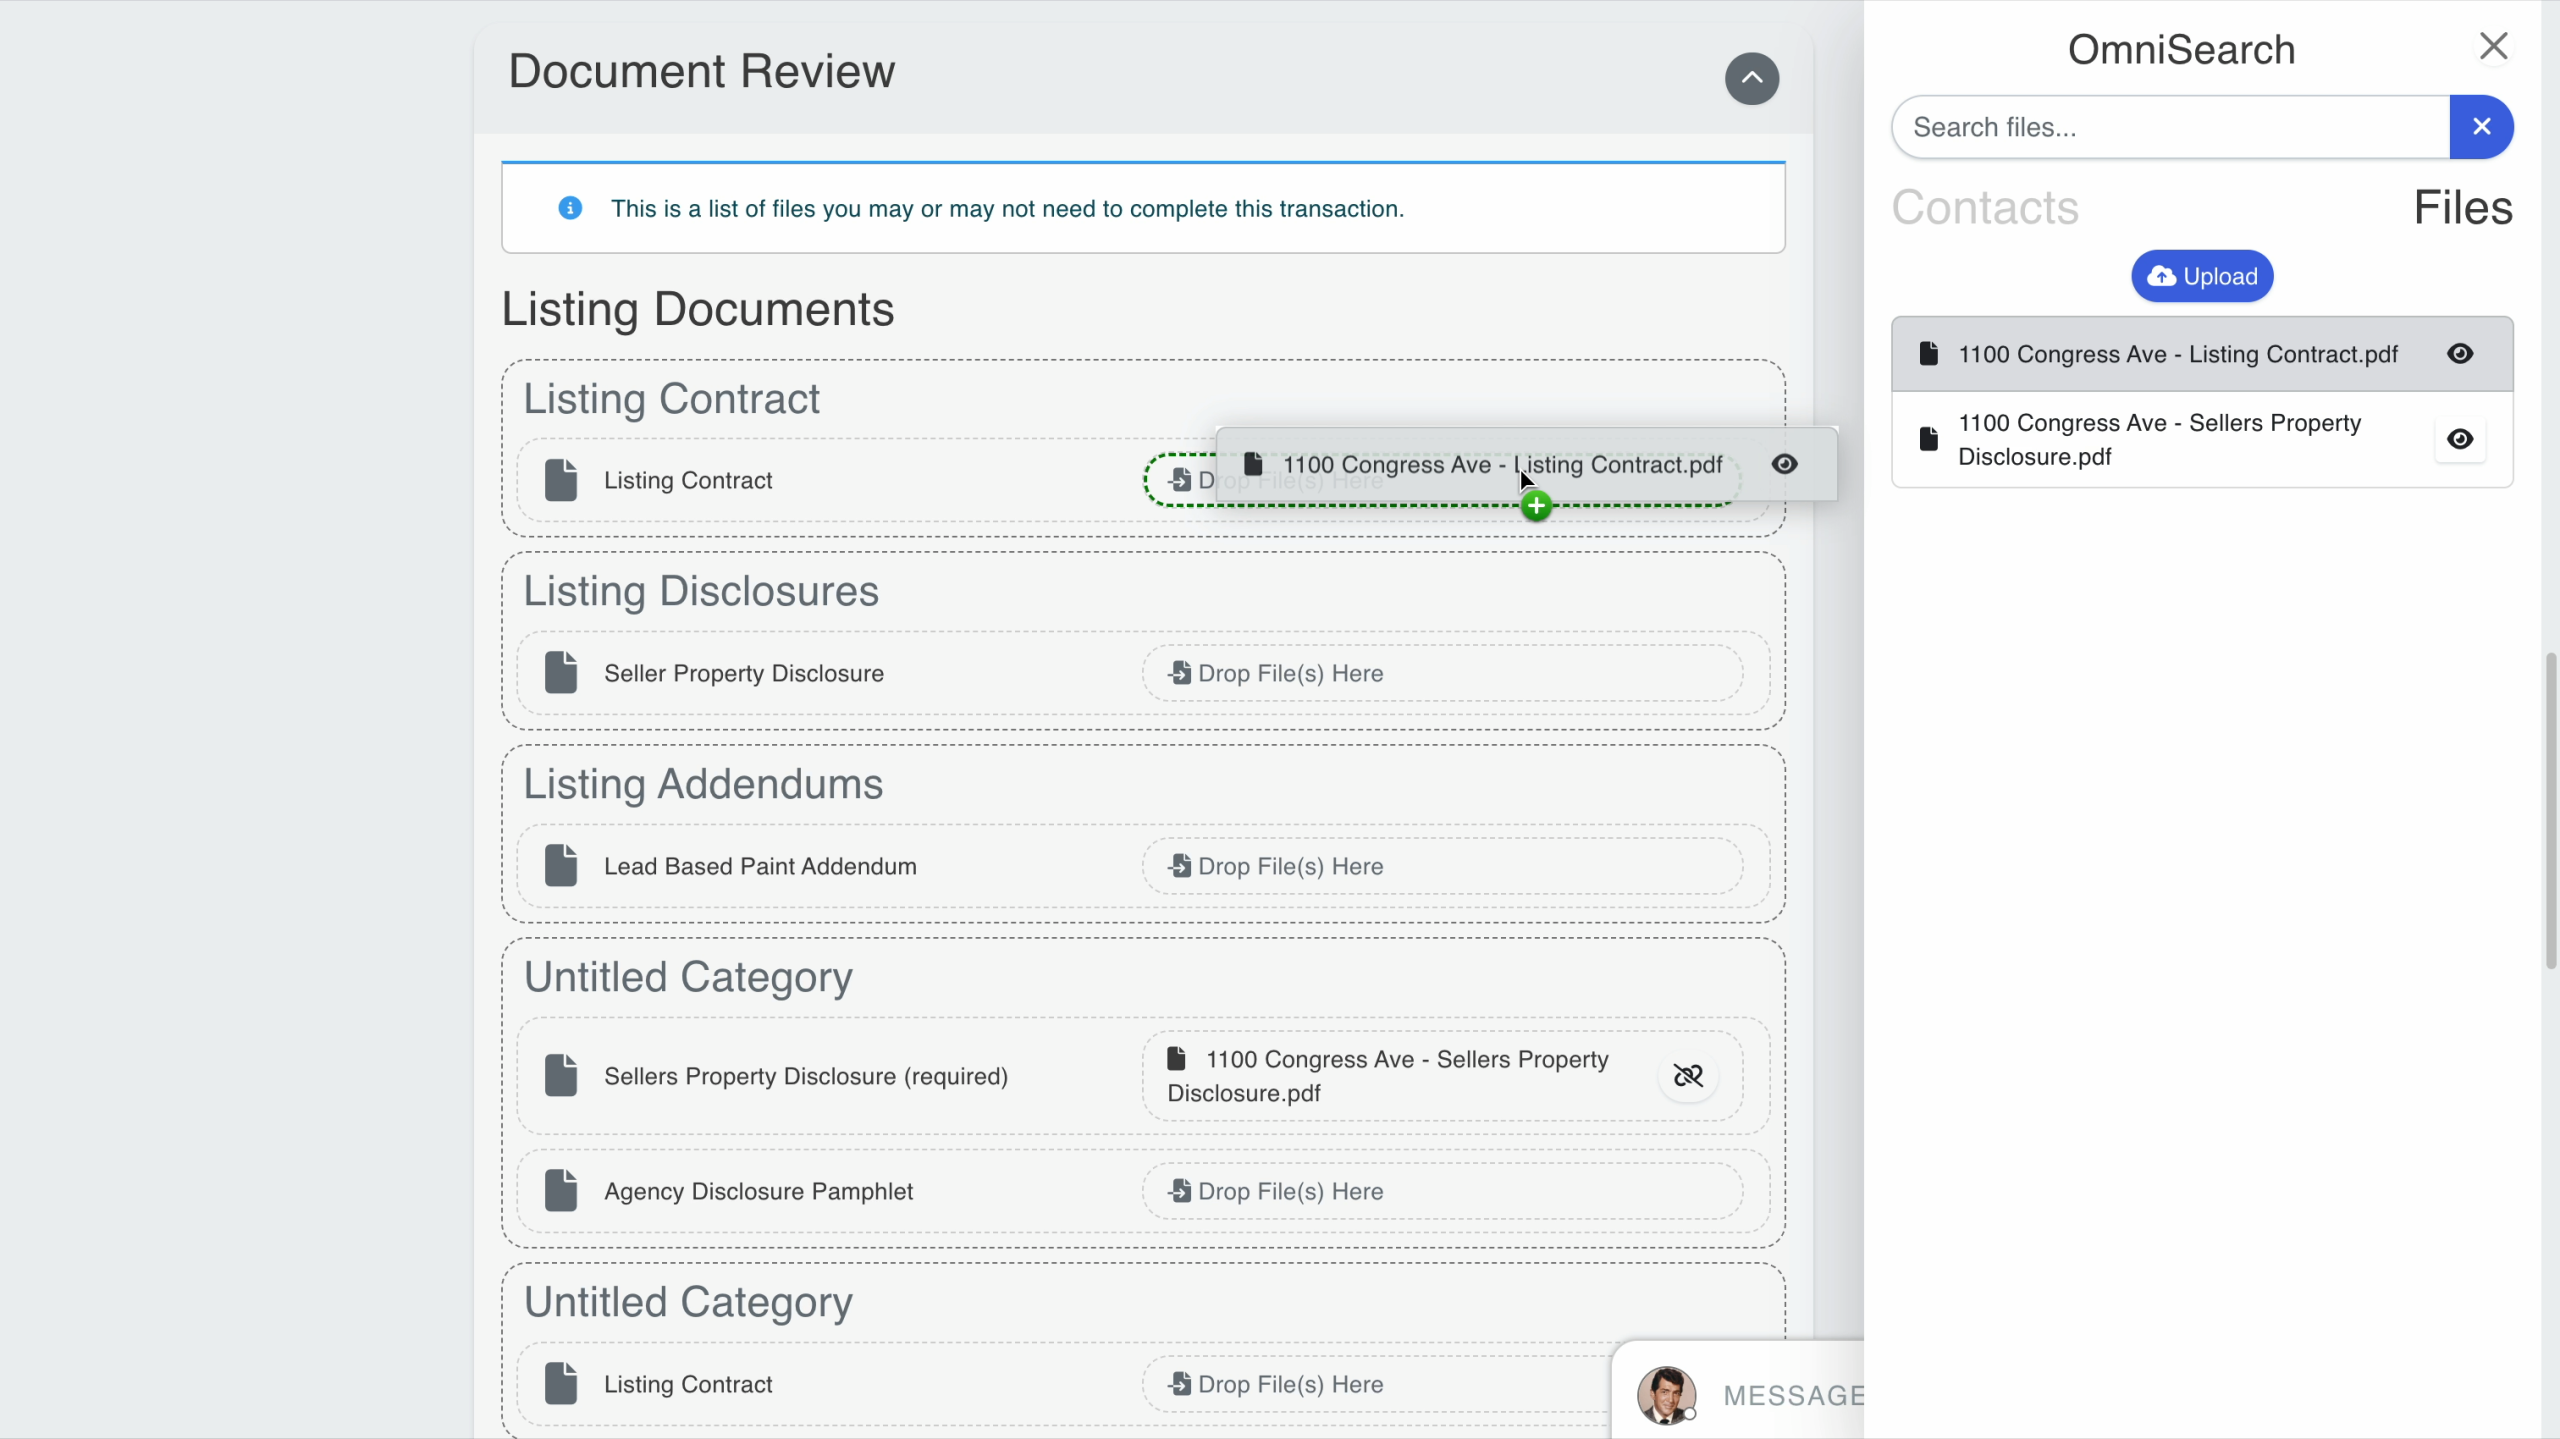
Upload your fully-signed offer in the Transaction Documents section. Agents can also upload each individual transaction document as defined by the document review checklist, then drag-and-drop them into the appropriate sections. If the fully-signed offer is not split at this time, then a transaction coordinator or brokerage owner will be required to split the document in the next steps.

Submit Listing for Initial Review
Click "Submit Fully Signed Transaction" at the bottom of the page to send this transaction to your transaction coordinator or brokerage owner for review.
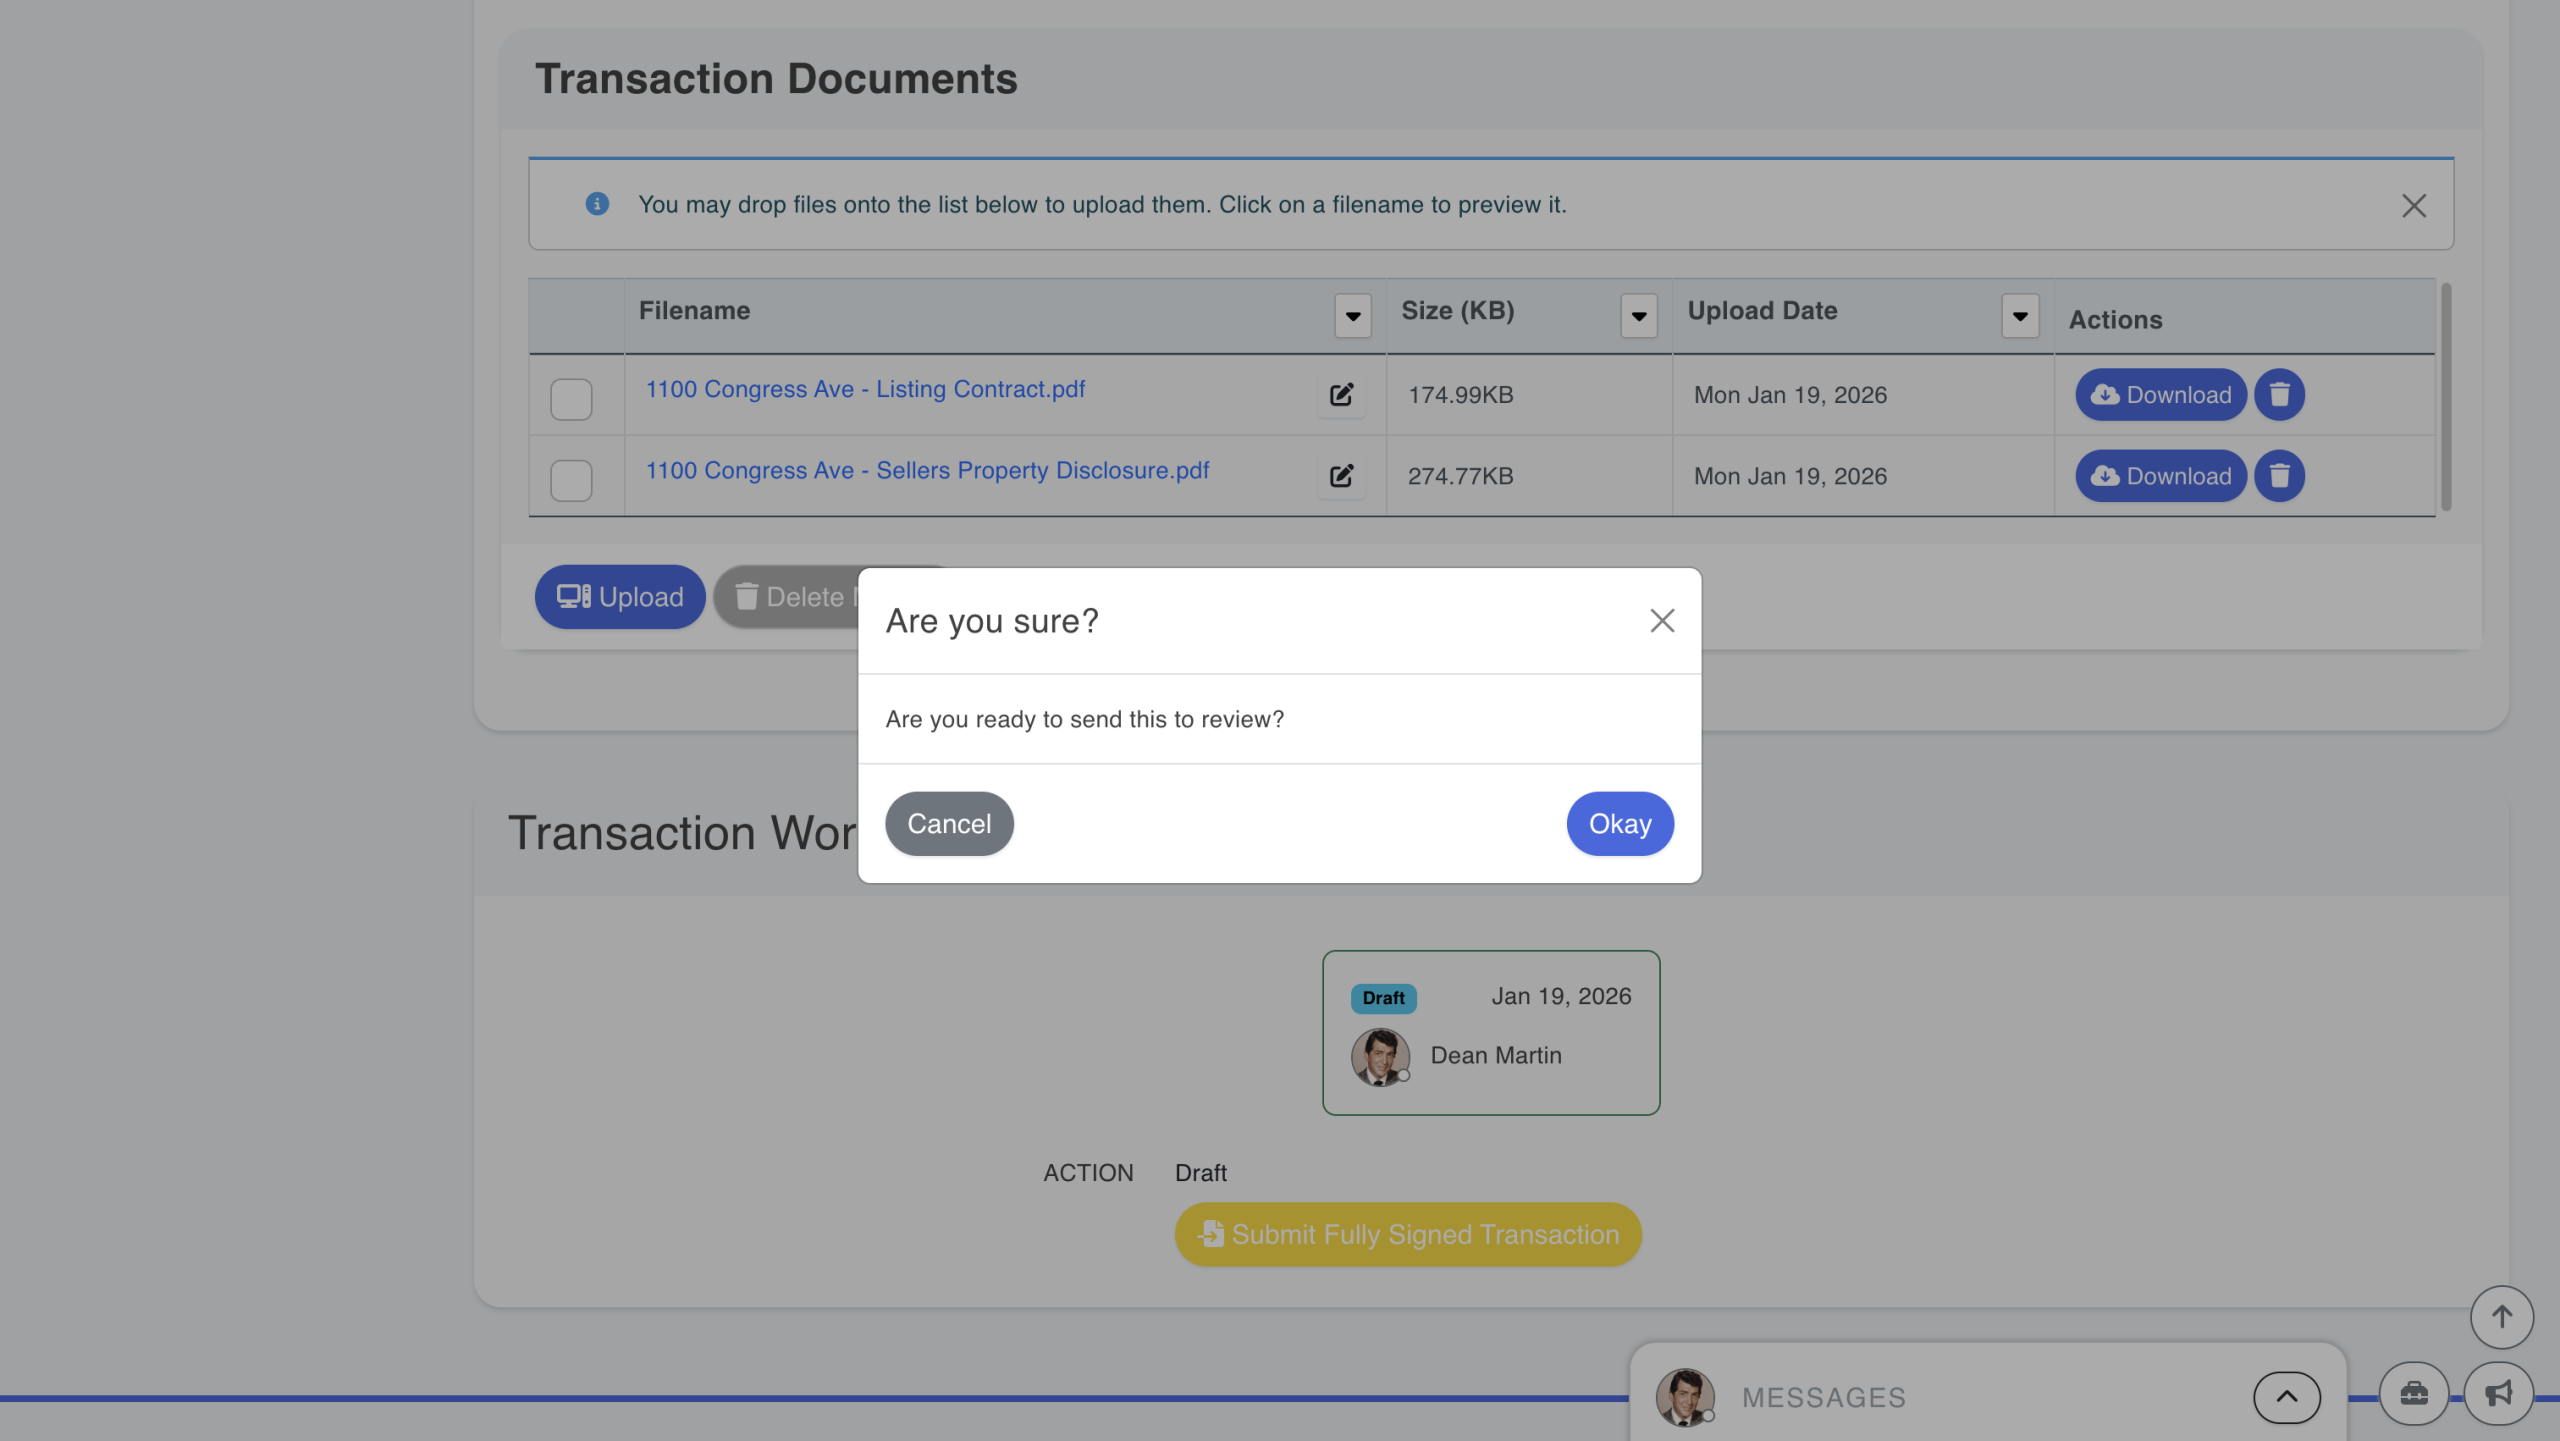
Transaction is Under Initial Review by Transaction Coordinator
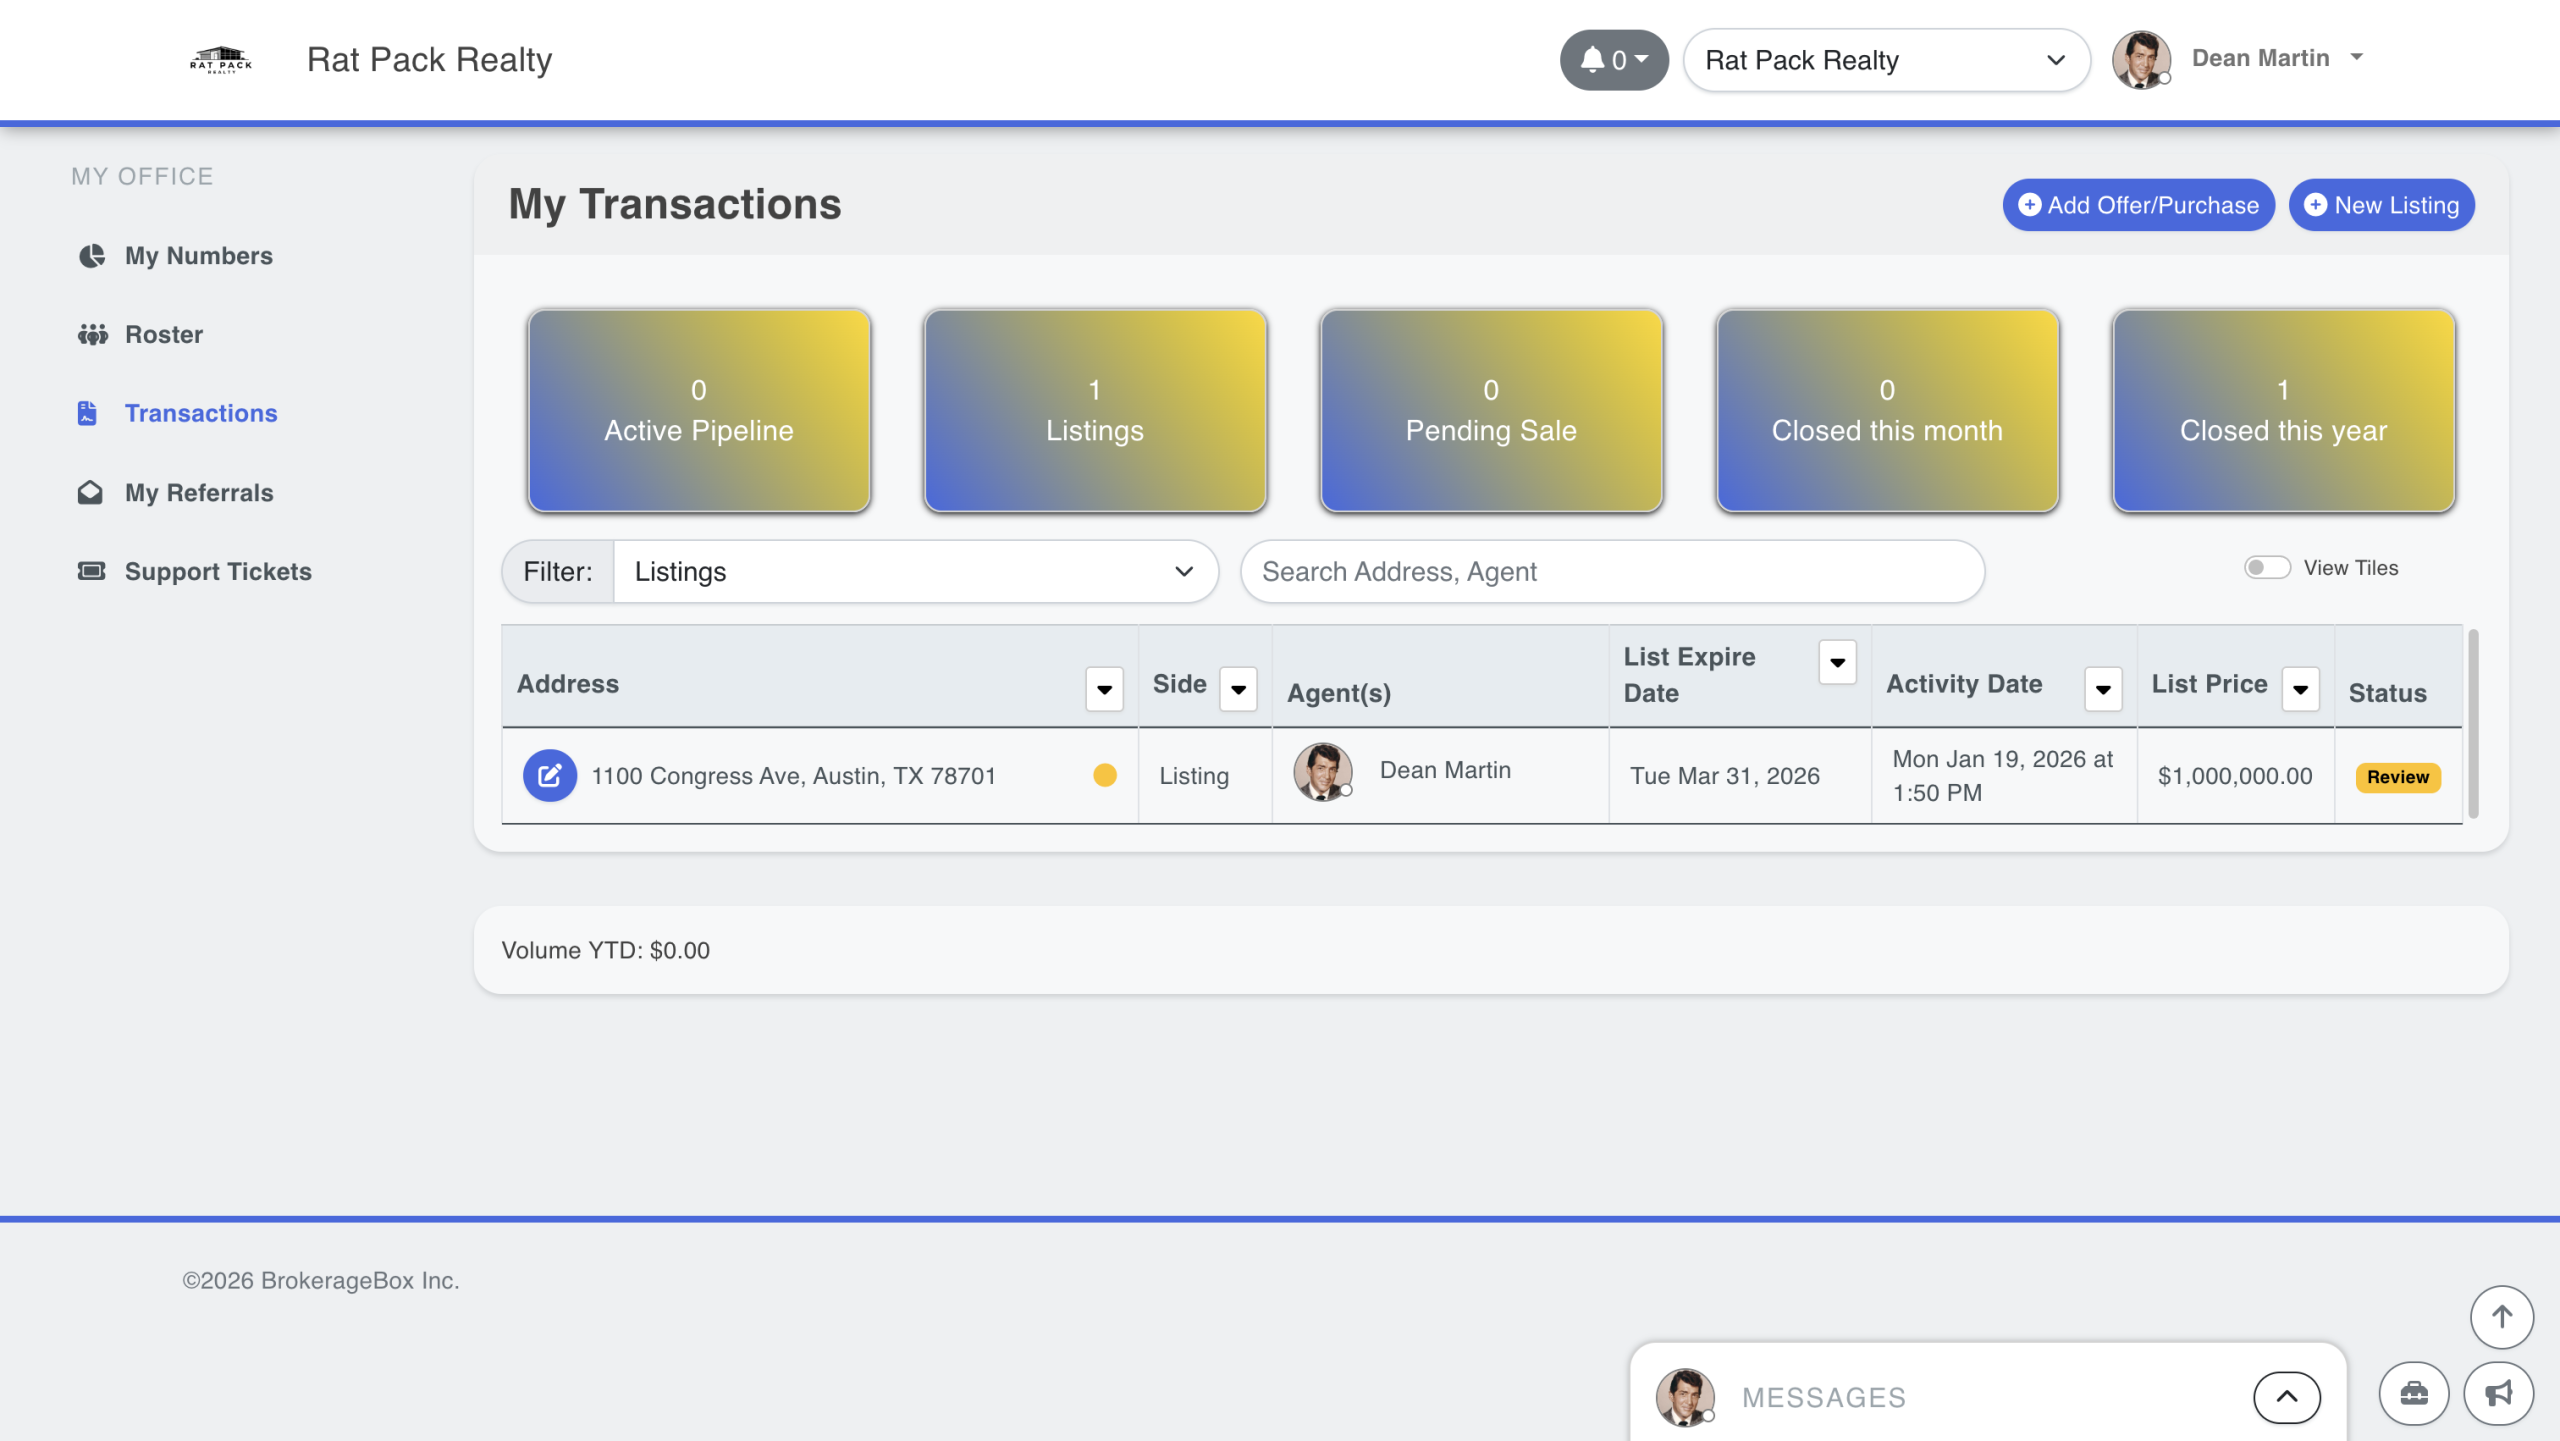
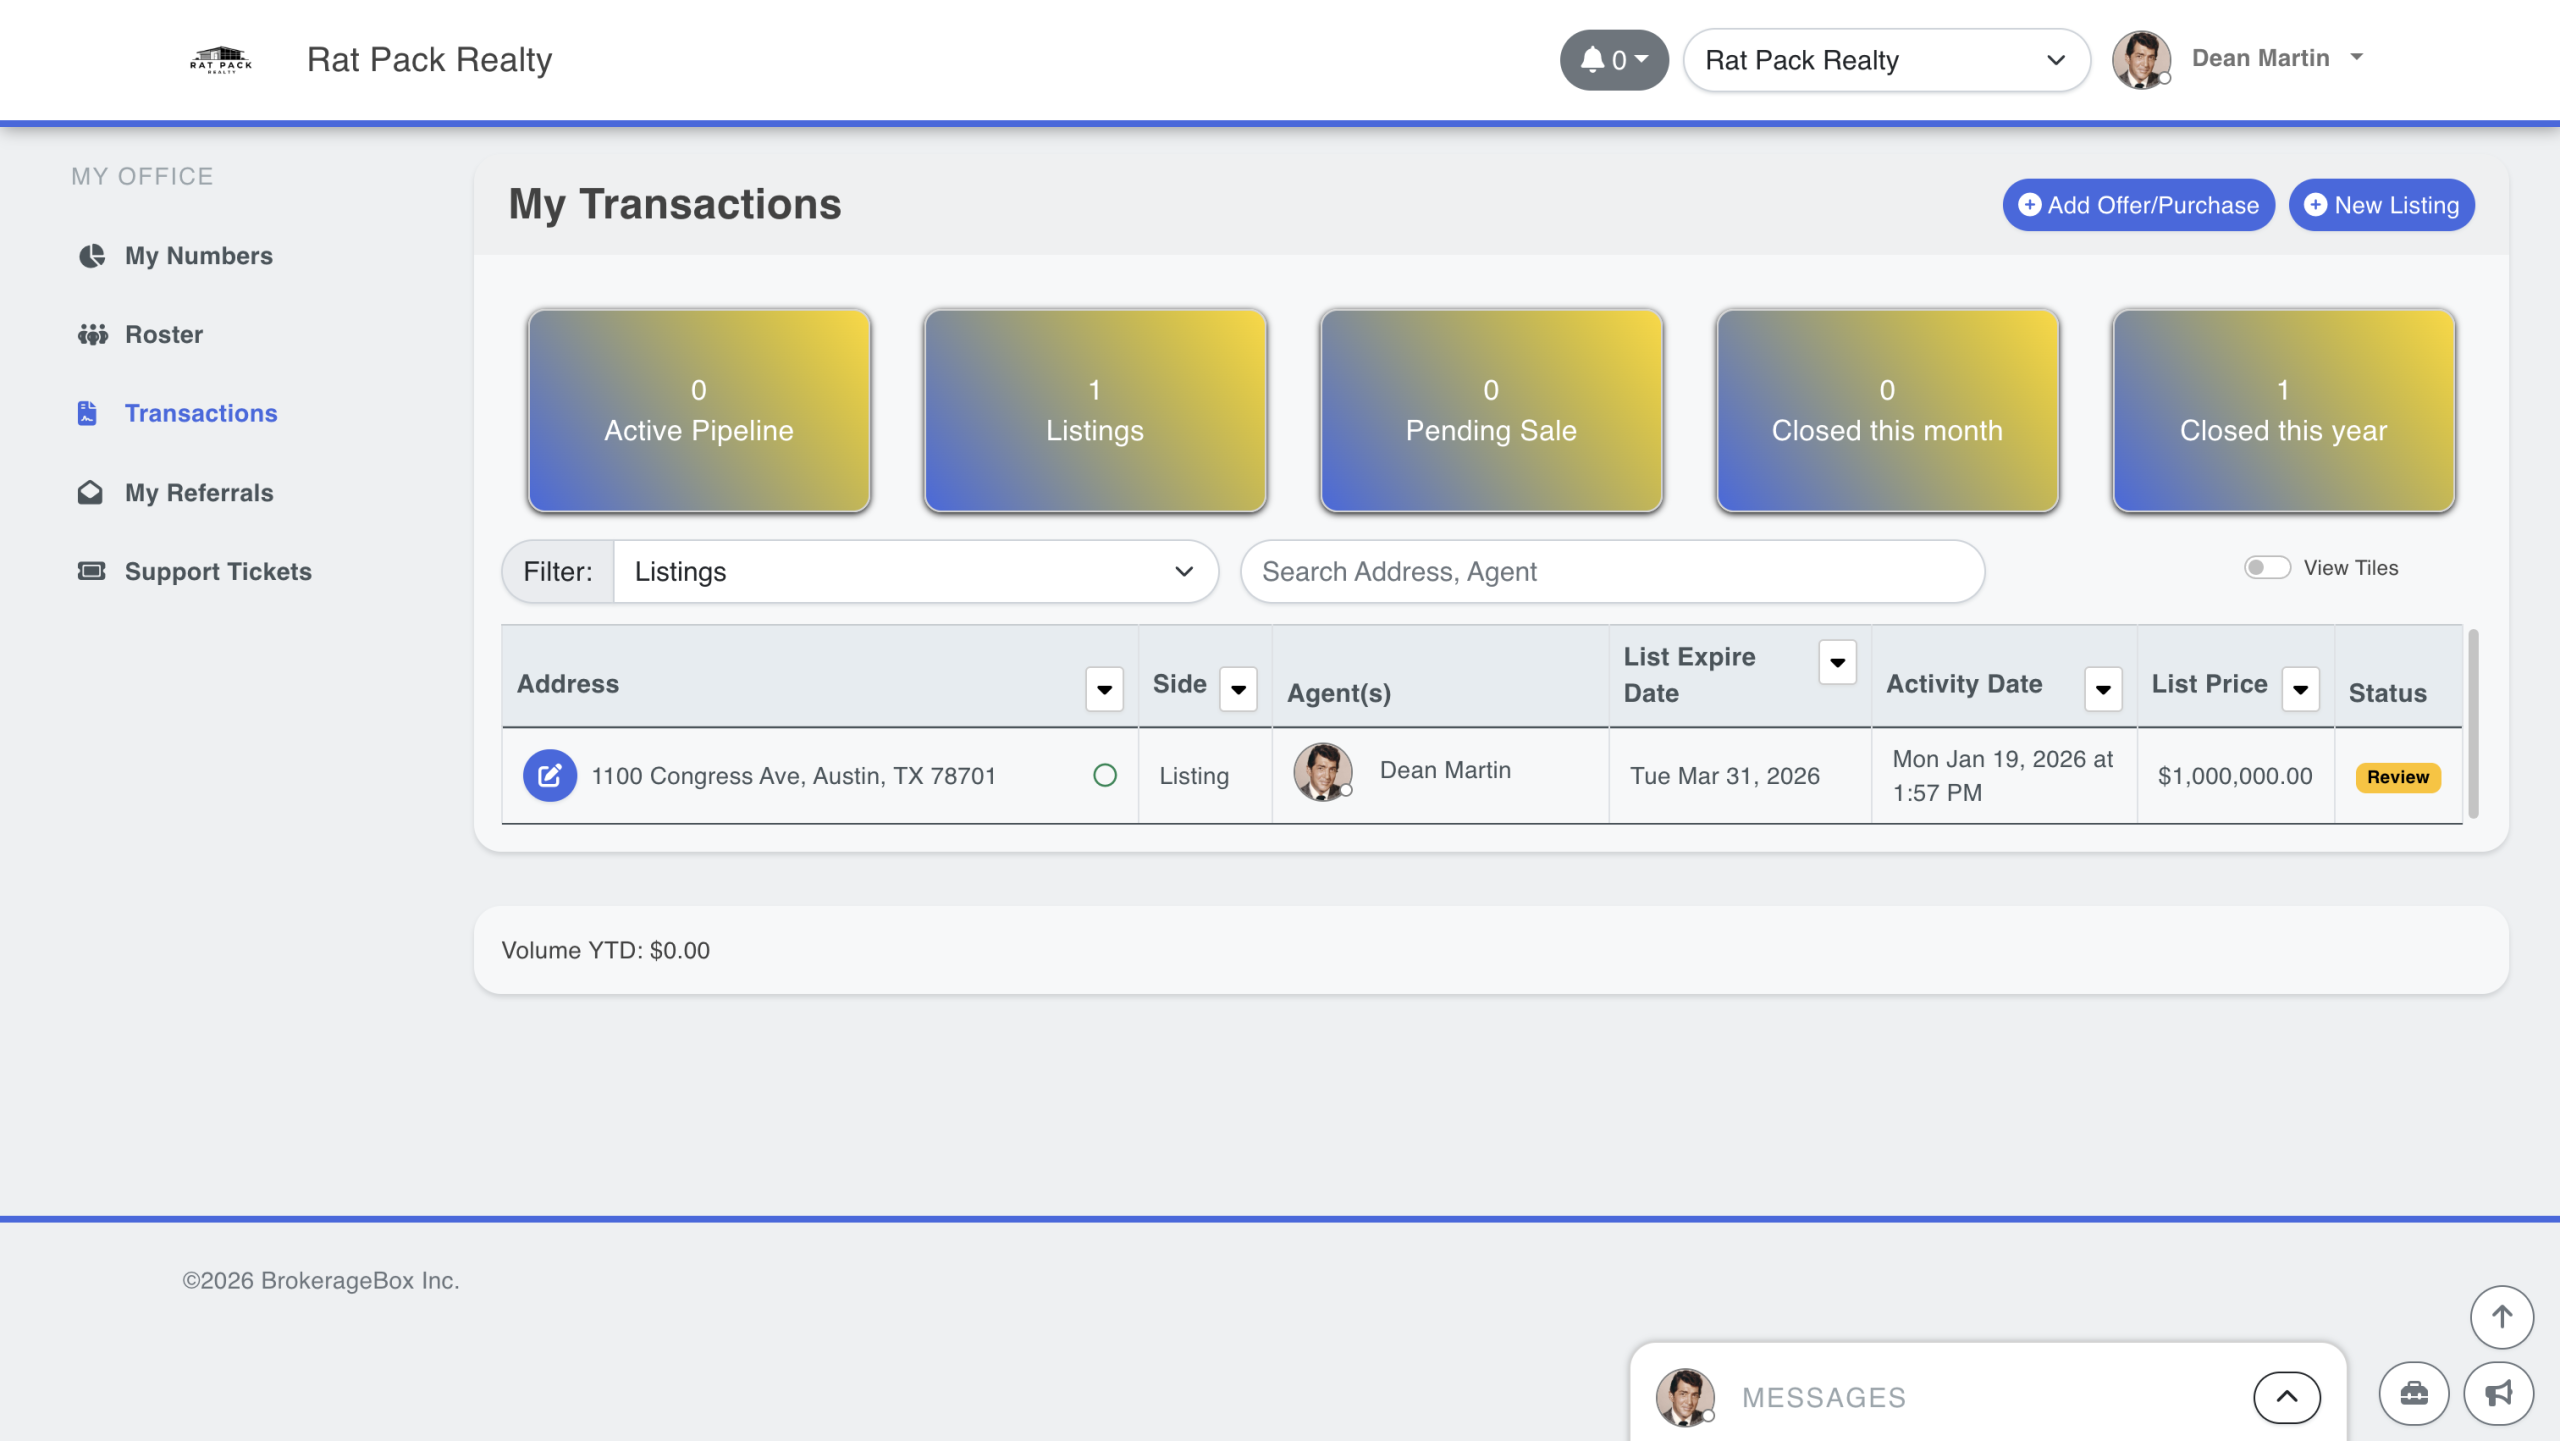
The transaction is now under the Listing category. This means that it has been submitted for initial review. The DotView indicator will remain yellow until the transaction coordinator has initially reviewed it.
If your office does not have a transaction coordinator, then it will be sent directly to the brokerage owner for final review.
Transaction Has Been Initially Reviewed
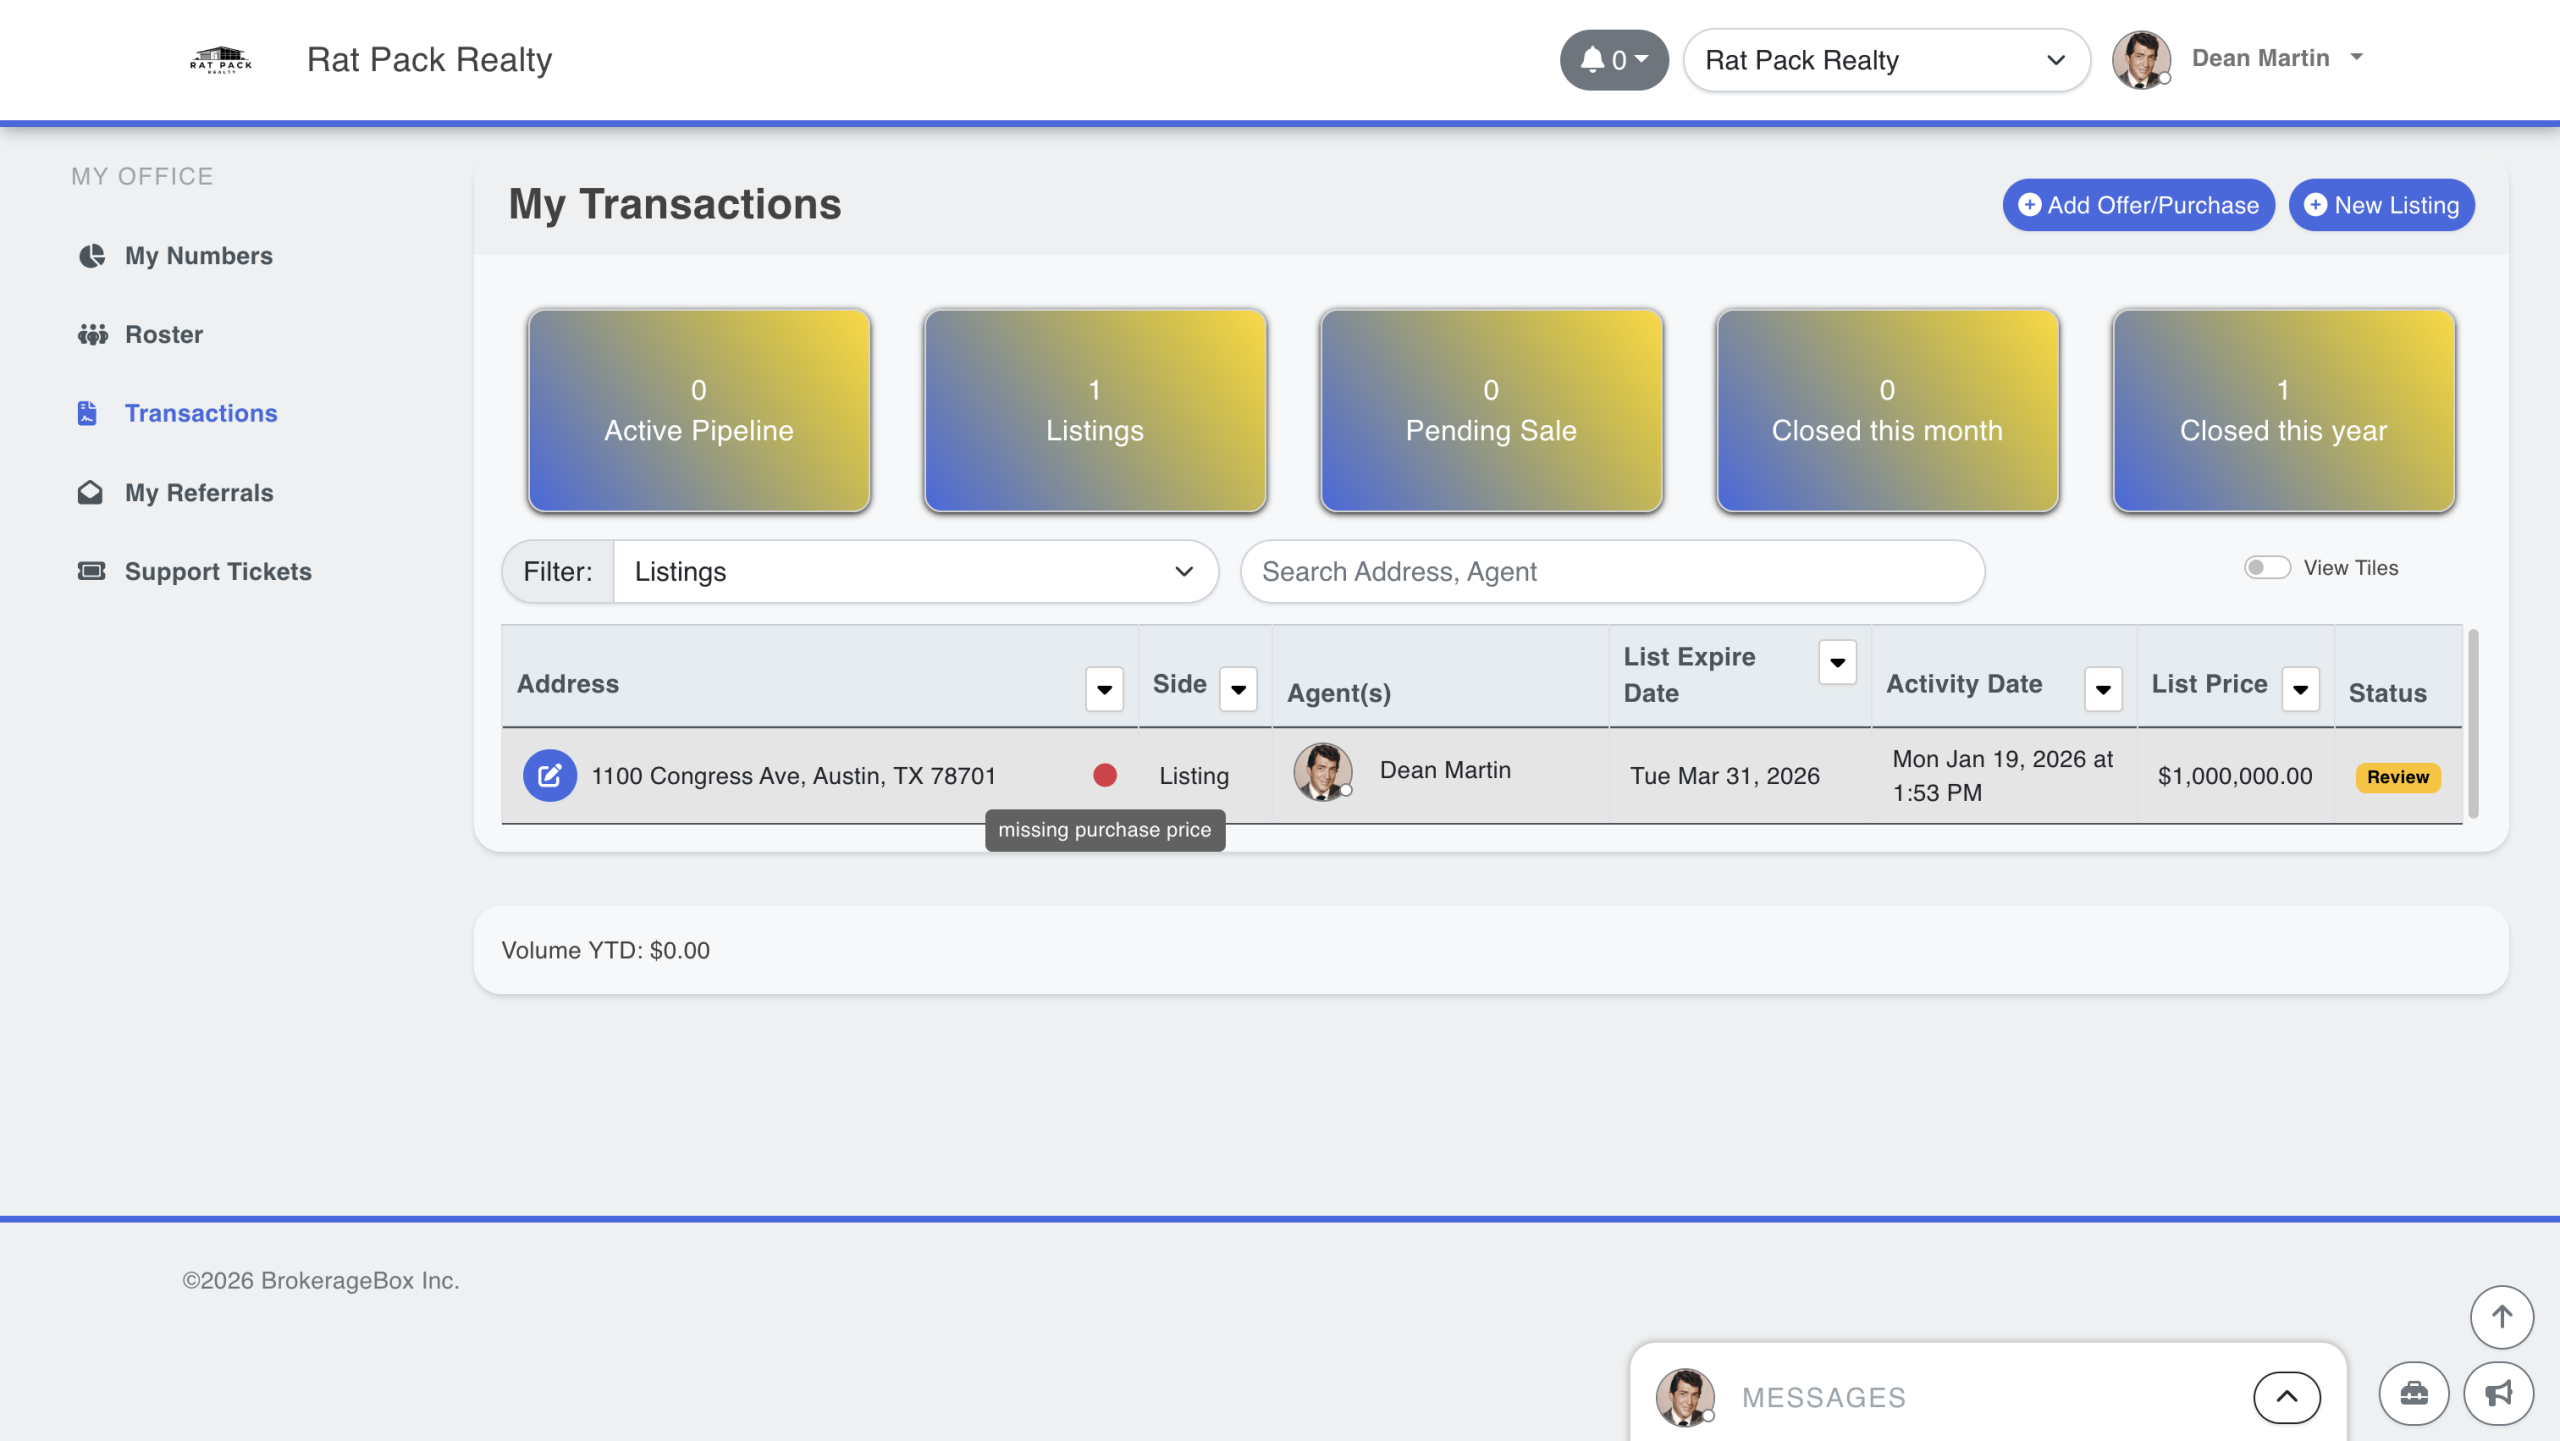
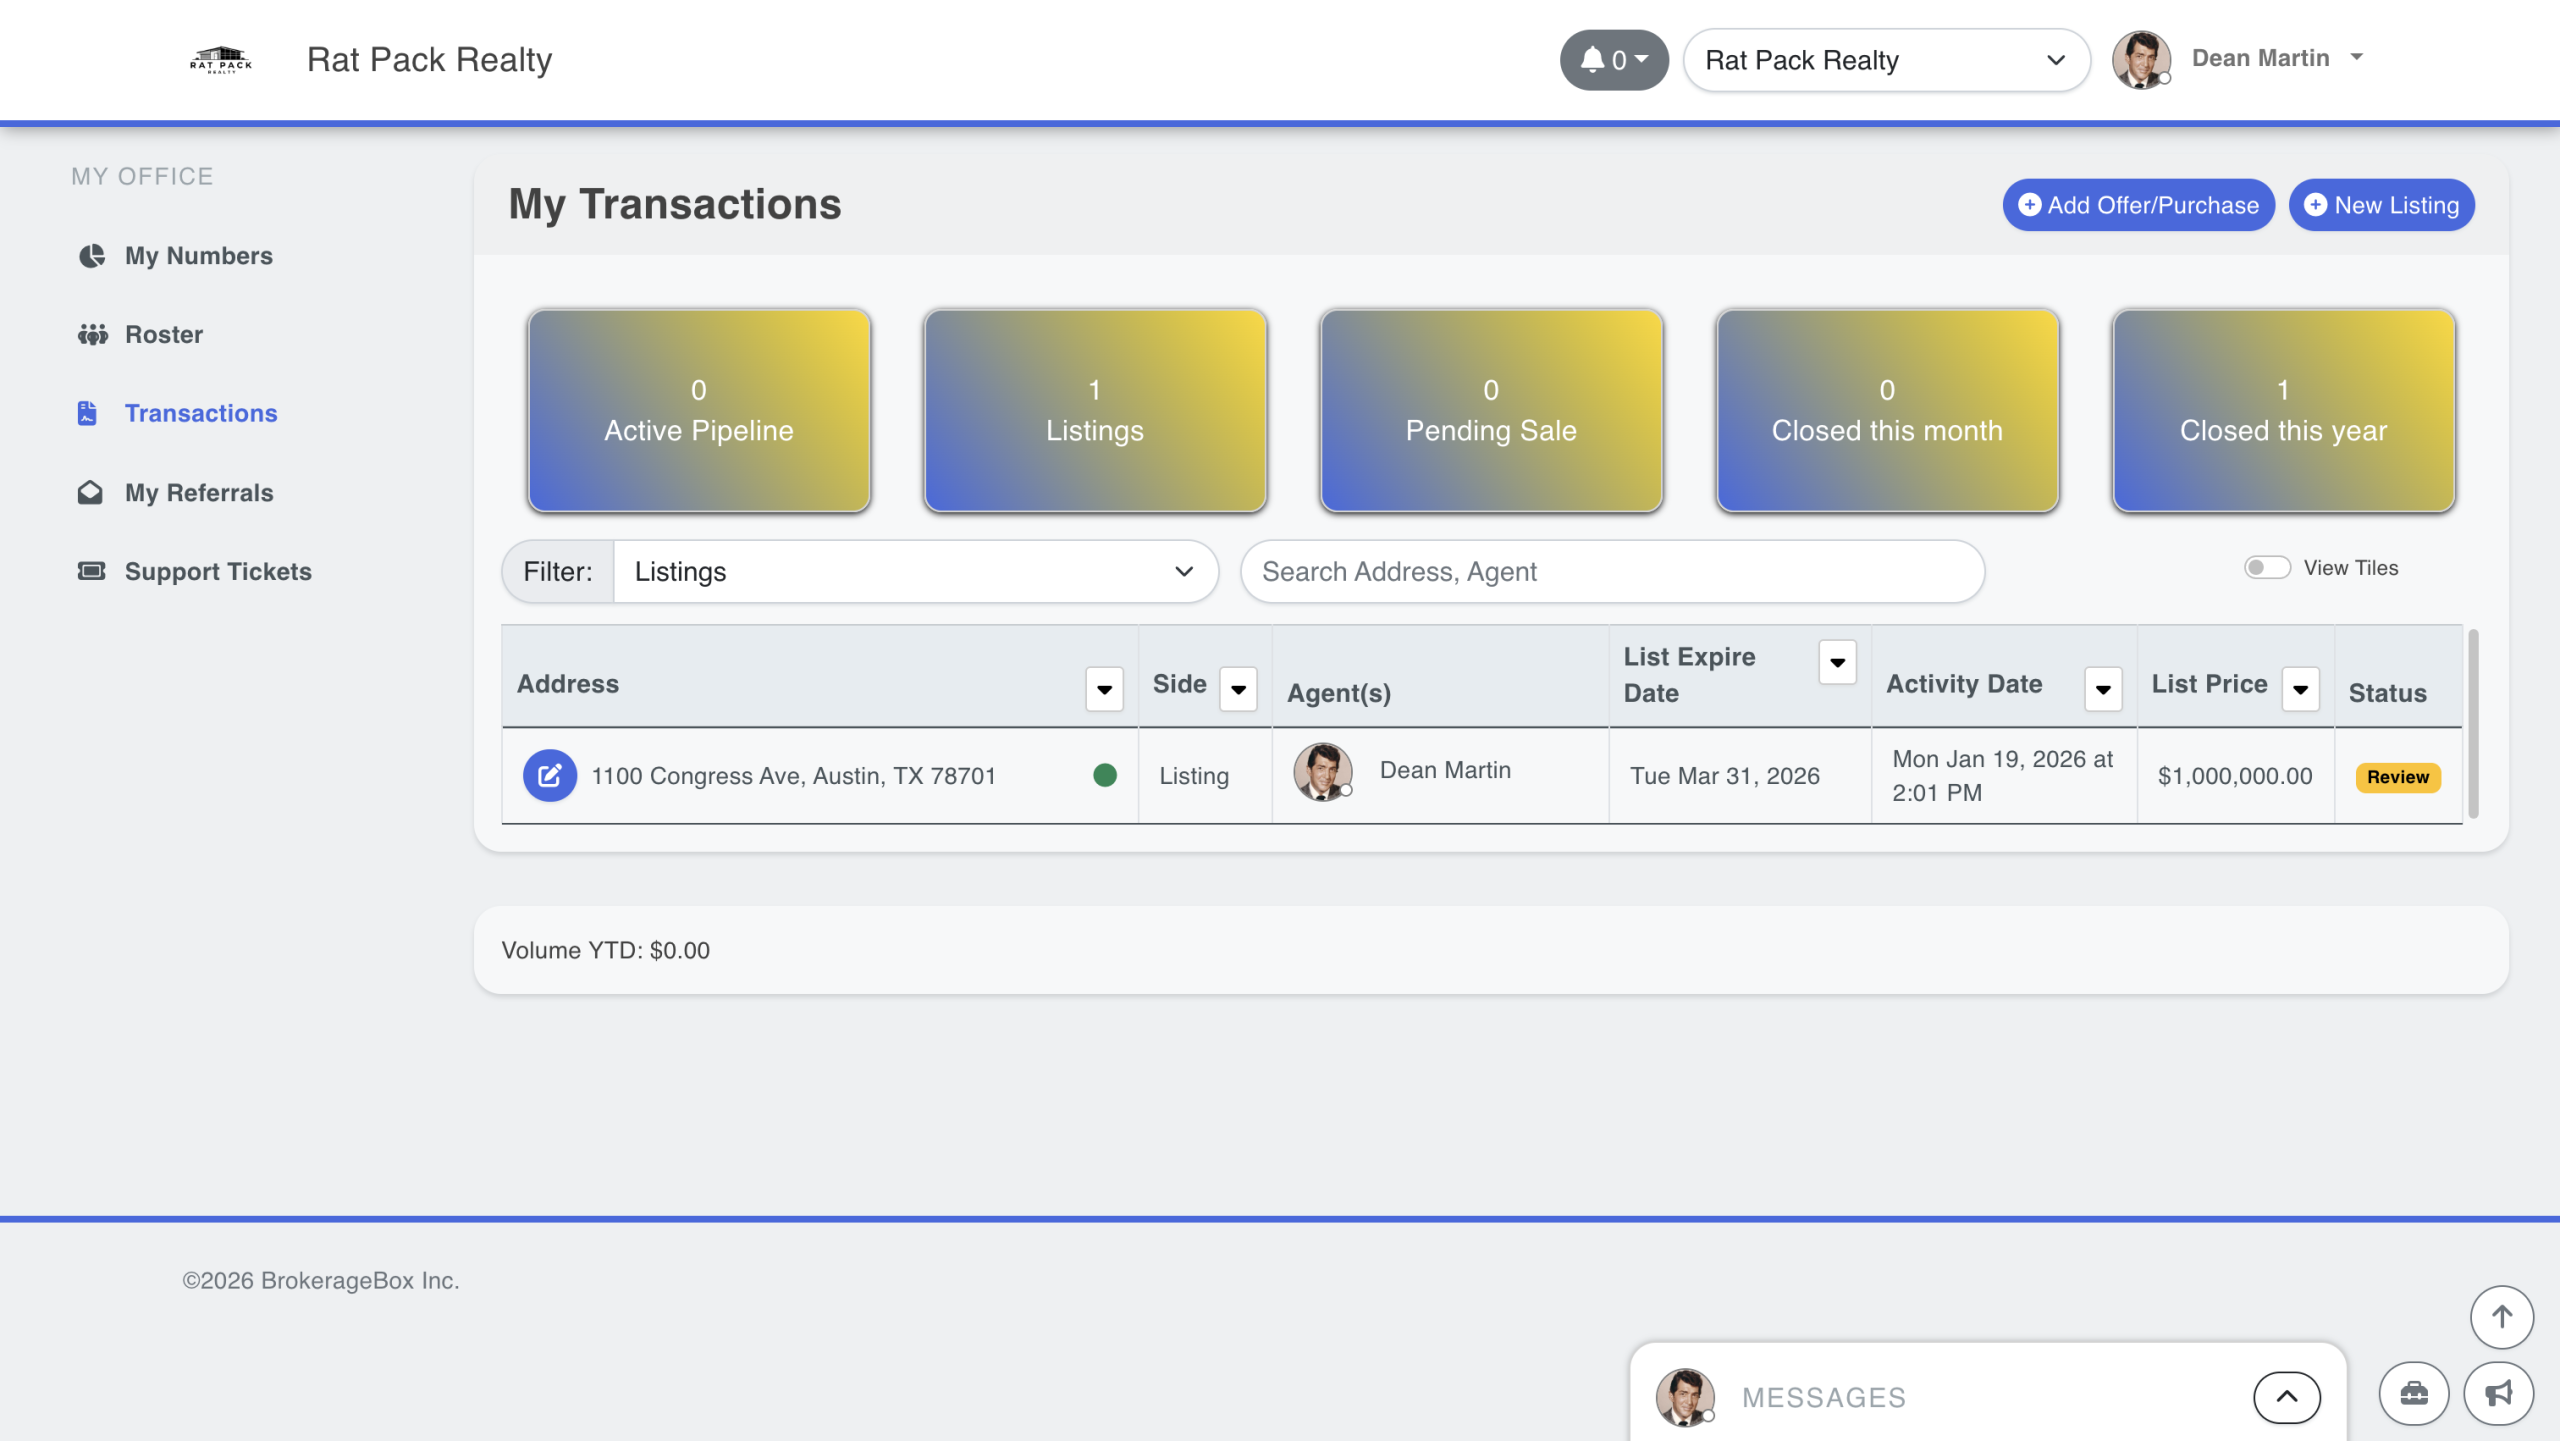
After the transaction has been initially reviewed by your transaction coordinator, it will either turn into a green circle if it passed review or a red dot, indicating that it failed review. For a failed review, you can hover over the red dot to preview the document feedback. Agents should always look for red dots to efficiently fix their transactions.
Update Transaction Documents Based on Feedback
If the transaction failed review, then the agent should open the transaction and fix the documents in the Document Review section. At this point, the fully-signed offer has been split and categorized into the appropriate sections as defined by the document review checklist. Click "Fix" or open OmniSearch from the bottom right hand corner of the screen, then upload the new documents, and drag-and-drop them into the failed sections.
You will have the option to either add or replace the document. Adding the document allows you have a history of the document updates whereas replacing the document overwrites it.

Transaction is Under Final Review by Brokerage Owner
Once your listing transaction has passed initial review by the transaction coordinator, the DotView indicator will turn into a green circle.
Transaction Has Been Finally Reviewed
Moving on, the transaction will be finally reviewed by your brokerage owner. If the brokerage owner fails the review, then the transaction will flow back to the beginning of the document review process as previously described. If the brokerage owner passes the review, then the transaction indicator will become a green dot. At this point, your listing transaction will stay in the Listing category until there is an offer on the listing.
Upgrade Listing Transaction to Listing Sold
Once you receive an offer on your listing, you click "Add Offer / Purchase" in the upper right hand of the Transaction module. Select the option "Yes" to "Is this offer on a listing you manage" and select the property from the drop down menu. Click "Create Offer" to upgrade the "Listing" transaction to a "Listing Sold" transaction.

Listing Sold Transaction is in Pending Sale Category
Your upgraded listing sold transaction will now be placed in the Pending Sale category. From this point on, you will treat this transaction like a sale transaction. Follow the instructions in our support article How to Create a Sale Transaction in BrokerageBox to proceed.