
Overview
The BrokerageBox free platform for real estate enables you to create Custom Virtual Dashboard icons / links right from the home screen of the platform. Icons can either be internal, linking to BrokerageBox-specific modules, or external, linking to your favorite real estate tools. The BrokerageBox platform serves as your home base for all things real estate.
During brokerage account set up, the brokerage owner will initially configure the default agent dashboard by setting up "brokerage-managed" icons for links generic to your real estate brokerage. Examples for these links include your regional MLS website, lockbox provider, etc. These links will only be editable by the brokerage owner. For more information on how to configure brokerage-managed icons during initial set up, visit our support article How to Initially Set Up Account on BrokerageBox.
After brokerage account set up is complete, agents or brokerage owners alike can customize their own personal custom virtual dashboard. These links / icons will only be visible from that users personal dashboard.
Create New Custom Virtual Dashboard Icon
As an agent or brokerage owner you can create a new icon by clicking the edit symbol in the upper right hand corner of the dashboard, then clicking Add New Icon. Brokerage owners will have the option to make this icon "brokerage-managed" for the entire office.
Edit Custom Virtual Dashboard Icons
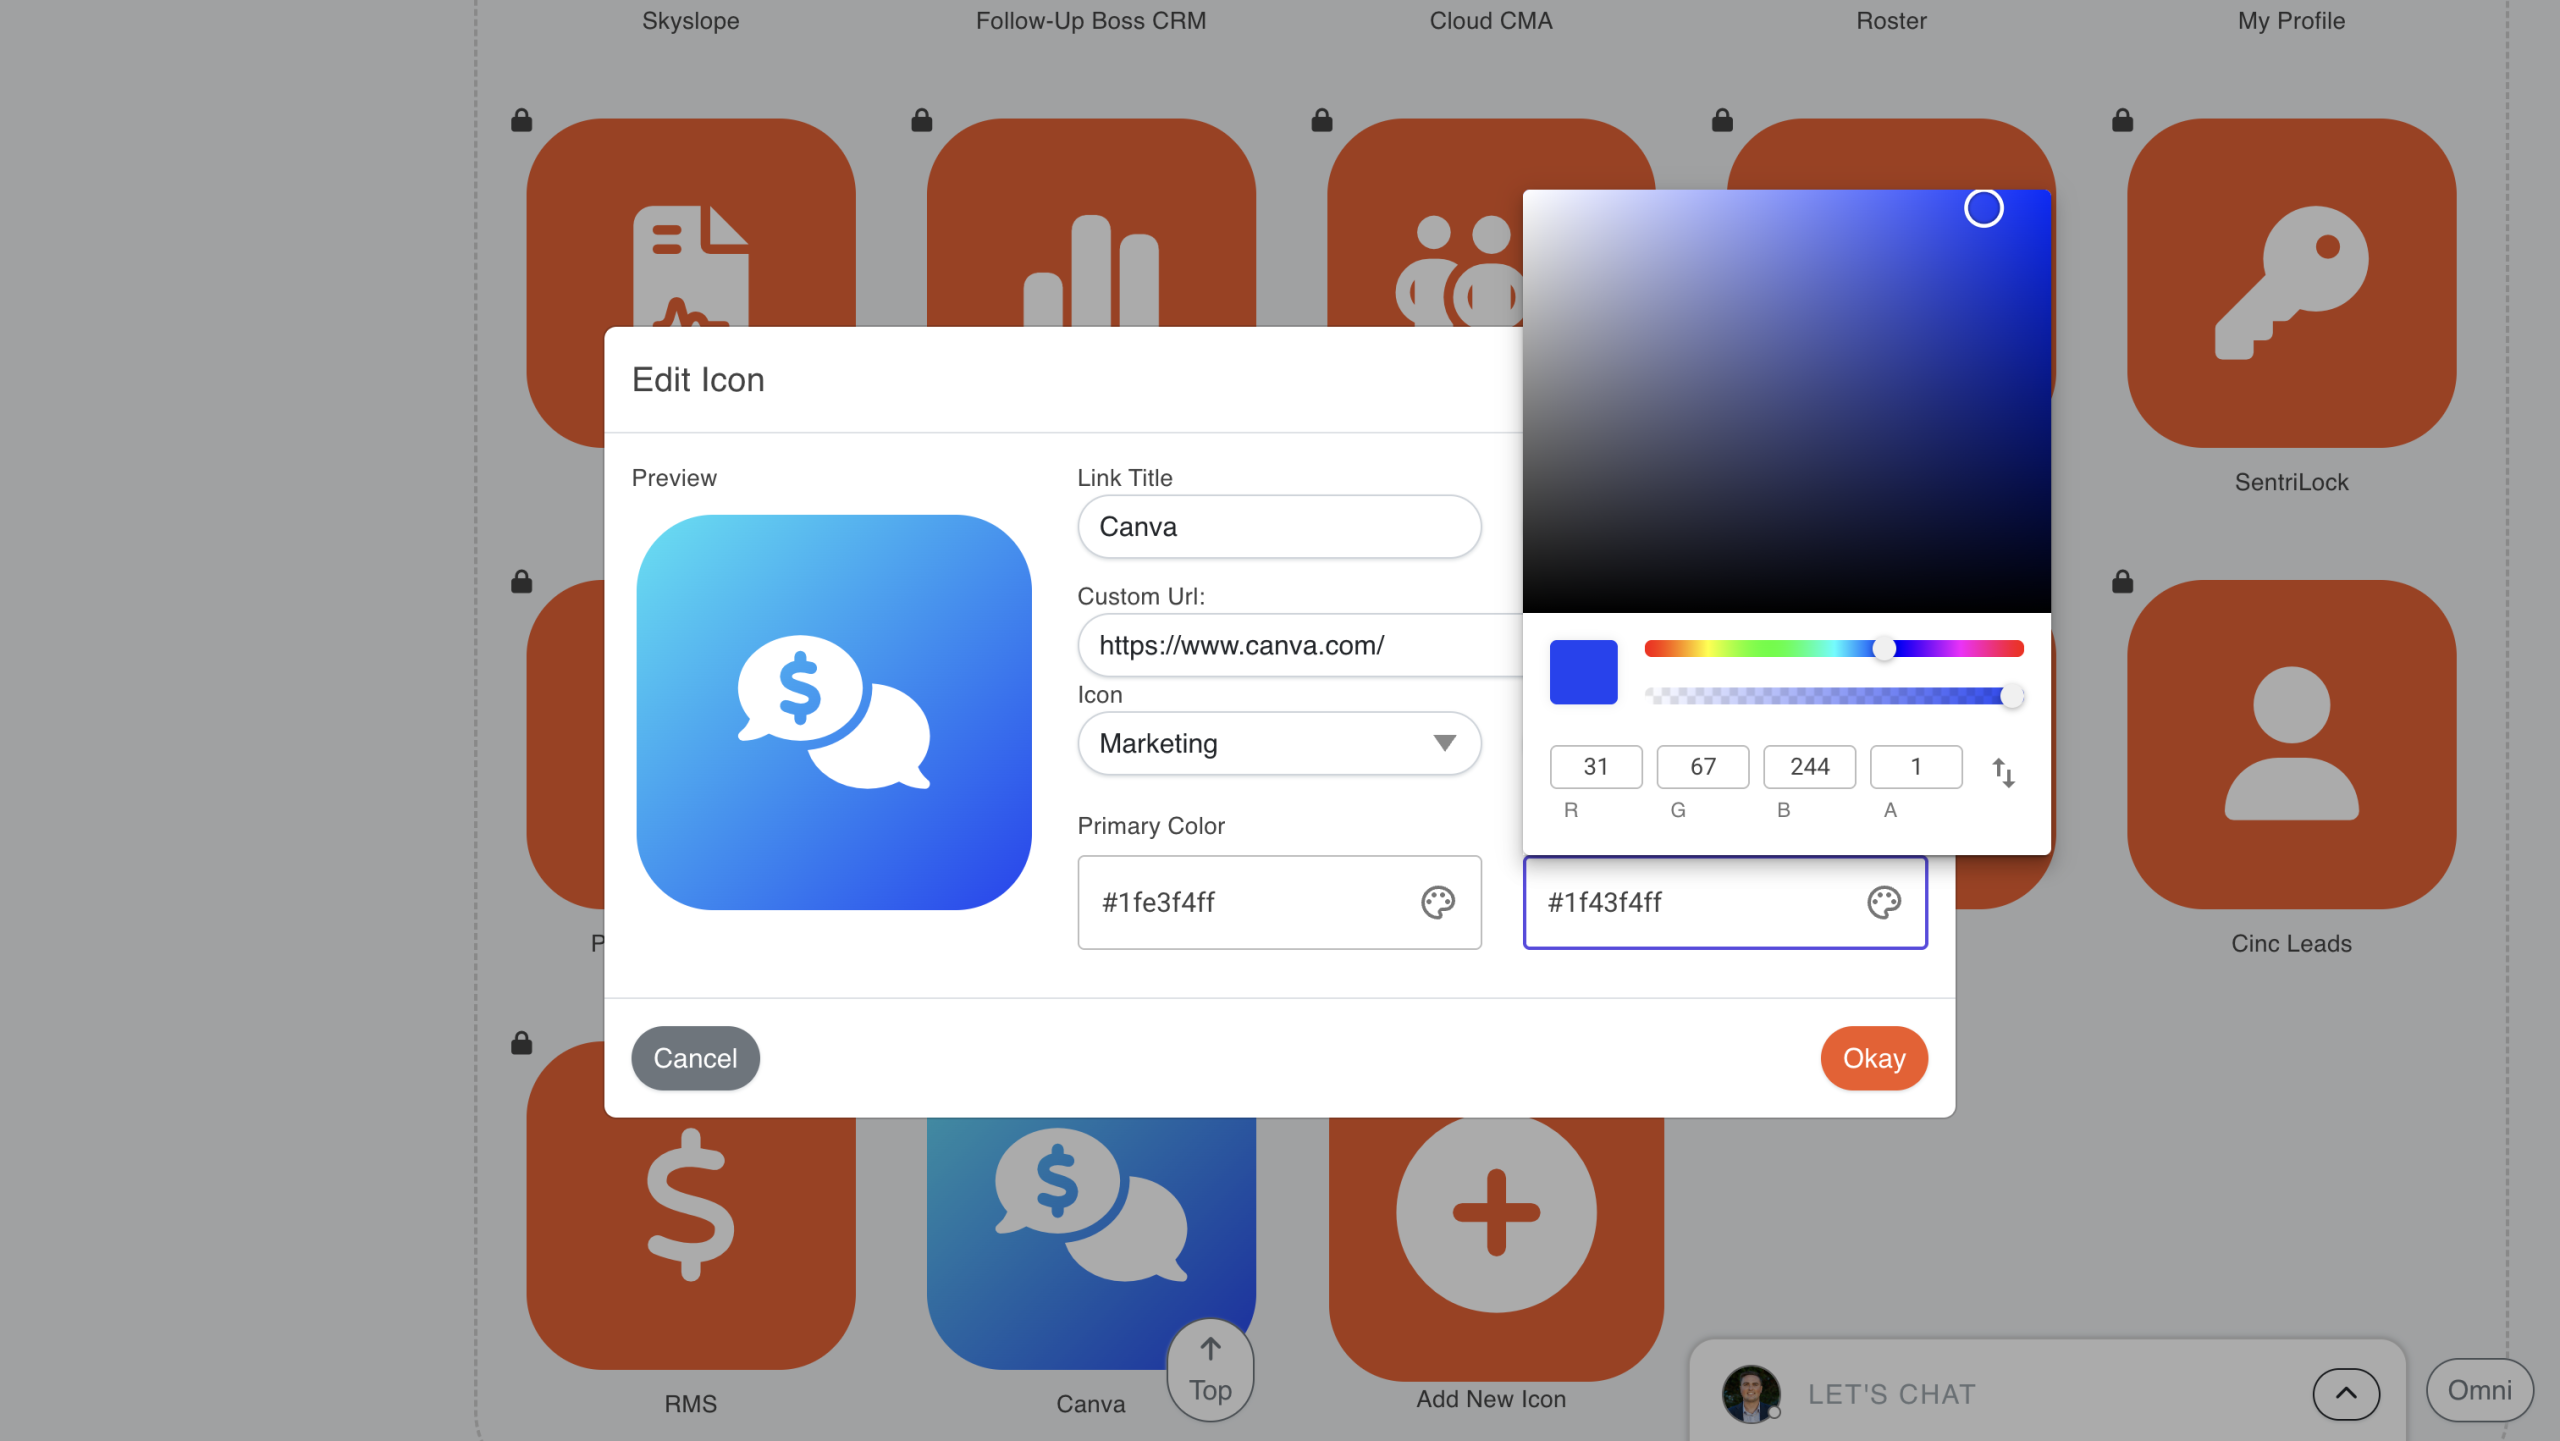
For any new or existing icon, you can edit the link title, URL, icon symbol, or colors by clicking the edit button then clicking on the icon.
Re-Order Custom Virtual Dashboard Icons
You can move the icons to a position of your liking by clicking the edit button, then dragging and dropping it in the dashboard.
Change Colors to All Custom Virtual Dashboard Icons
Additionally, you can change the colors of all your custom virtual dashboard icons by using the color updater tool. Click the edit button, then select Custom from the down menu next to the Color Updater. Select your colors and click Apply All. If you want to revert back to your office colors, simply select Office Colors from the drop-down menu, then Select Apply All.


